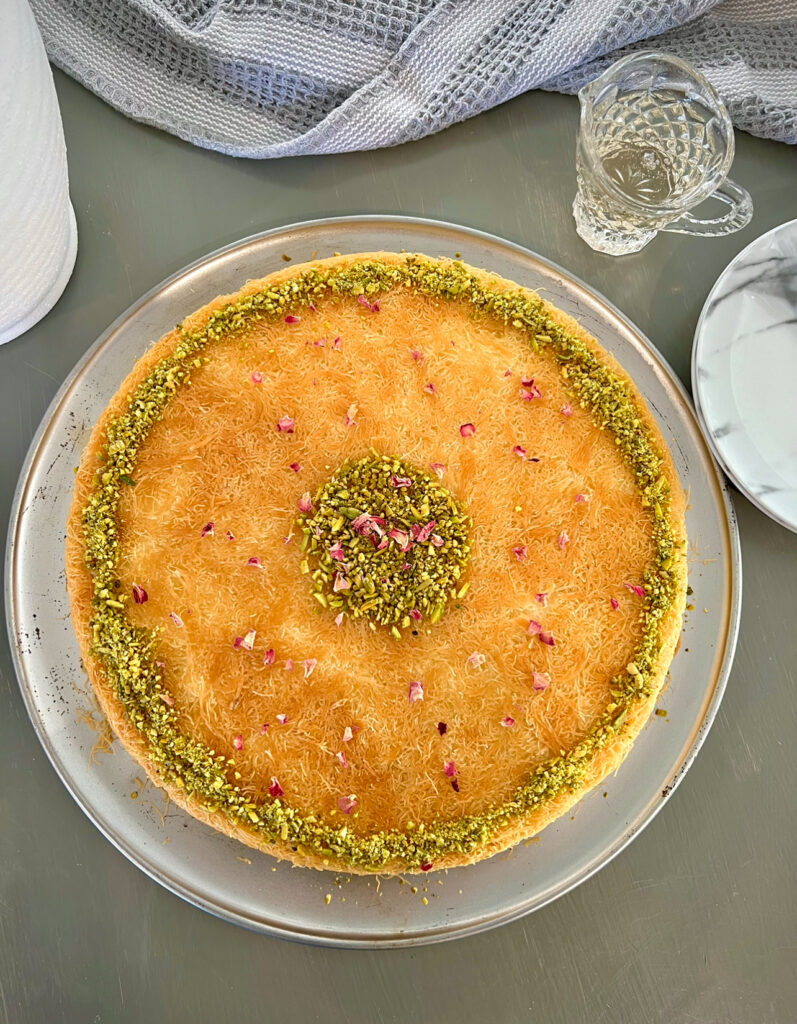
Othmaliye is a traditional Middle Eastern dessert crafted from kataifi shredded dough filled with creamy homemade ashta. Typically, the shredded dough is baked separately and then filled with chilled ashta. However, I enjoy a variation where the kataifi dough and ashta are baked together in the oven. To elevate the flavor, I often add cheese—though it’s optional. This twist creates a delightful blend of flavors, combining the best of kunafa and traditional othmaliye into one irresistible dessert
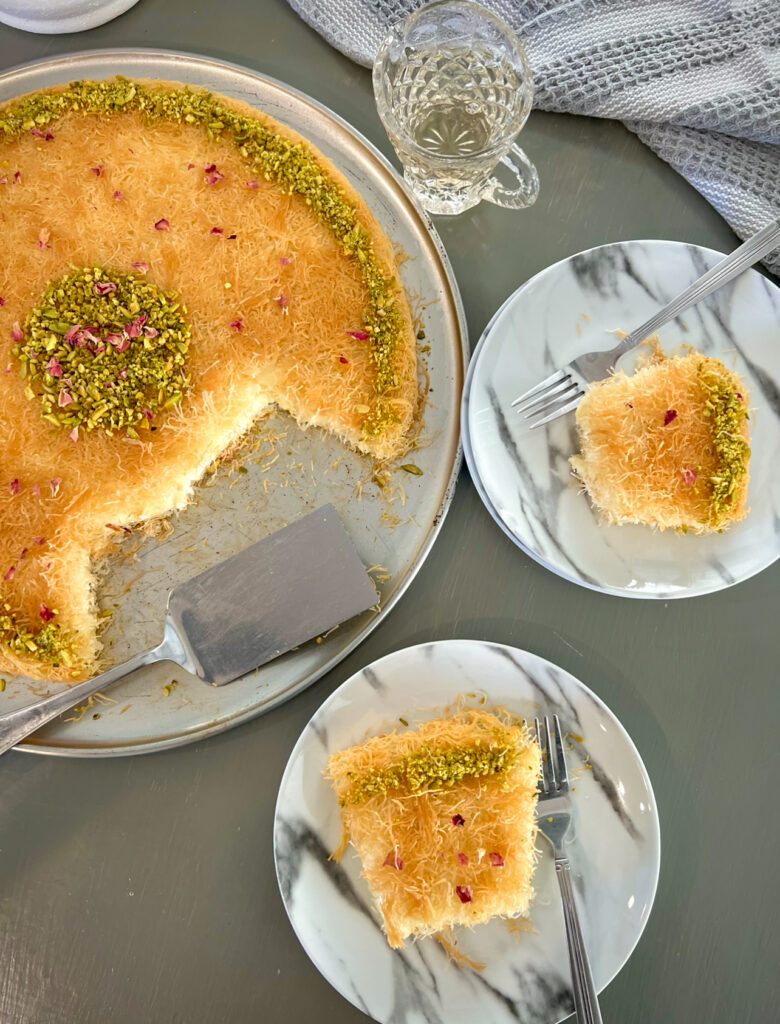
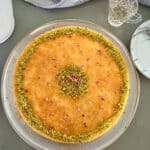
Othmaliye is delightfully crispy on the outside, with a creamy and cheesy interior. It’s best enjoyed warm, topped with simple syrup and crushed pistachios for the perfect finishing touch.
You can prepare it with just ashta for a classic taste or mix in cheese for an extra layer of rich, cheesy goodness.
Recipe Summary
Texture: Crispy exterior, creamy and cheesy interior
Prep Time: 20 minutes
Cook Time: 45 minutes
Cooling Time: 10 minutes
Cuisine: Middle Eastern
Flavor Profile: Sweet, creamy, floral
What is Baked Othmaliye with Ashta and Cheese?
Baked Othmaliye with Ashta and Cheese is a decadent Middle Eastern dessert featuring layers of crispy kataifi shredded dough, a creamy ashta (clotted cream) filling, and optional melted mozzarella cheese. The dessert is baked until golden brown, then drizzled with fragrant simple syrup infused with rose and orange blossom water and garnished with crushed pistachios.
This version of othmaliye offers a delightful twist by baking the ashta and cheese together with the kataifi dough, creating a rich and satisfying flavor that combines the best elements of traditional kunafa and othmaliye. It’s best enjoyed warm, making it a perfect centerpiece for special occasions or festive gatherings.
Ingredients
Main Ingredients
- Kataifi Shredded Dough: Thin, delicate strands of phyllo dough that become golden and crispy when baked. It forms the base and topping of the dessert.
- Melted Ghee or Unsalted Butter: Adds rich, buttery flavor and ensures the kataifi dough becomes evenly crisped and golden.
- Shredded Mozzarella Cheese: Provides a creamy, stretchy texture and a savory touch that complements the sweet ashta filling. Optional but highly recommended for a fusion twist.
- Crushed Pistachiosi: A classic garnish that adds a nutty flavor and crunchy texture to the dessert.
Ashta Ingredients (Cream Filling)
- Milk: A base liquid for the creamy ashta, lending richness to the filling.
- Whipping Cream: Enhances the creaminess and gives the ashta its luxurious texture.
- Cornstarch: A thickening agent that helps achieve the pudding-like consistency of the ashta.
- Sugar: Adds sweetness to balance the richness of the cream.
- Rose Water: Provides a light floral fragrance and flavor that is iconic in Middle Eastern desserts.
- Orange Blossom Water: Complements the rose water with its citrusy floral notes, enhancing the aroma.
Simple Syrup Ingredients
- Sugar: The base of the syrup, adding sweetness to the dessert.
- Water: Dissolves the sugar and serves as the liquid base for the syrup.
- Lemon Juice: Balances the sweetness with a hint of acidity and prevents crystallization.
- Rose Water: Infuse the syrup with floral notes.
- Orange Blossom Water Adds a subtle citrusy aroma to the syrup.
How to Make Baked Othmaliye with Ashta and Cheese
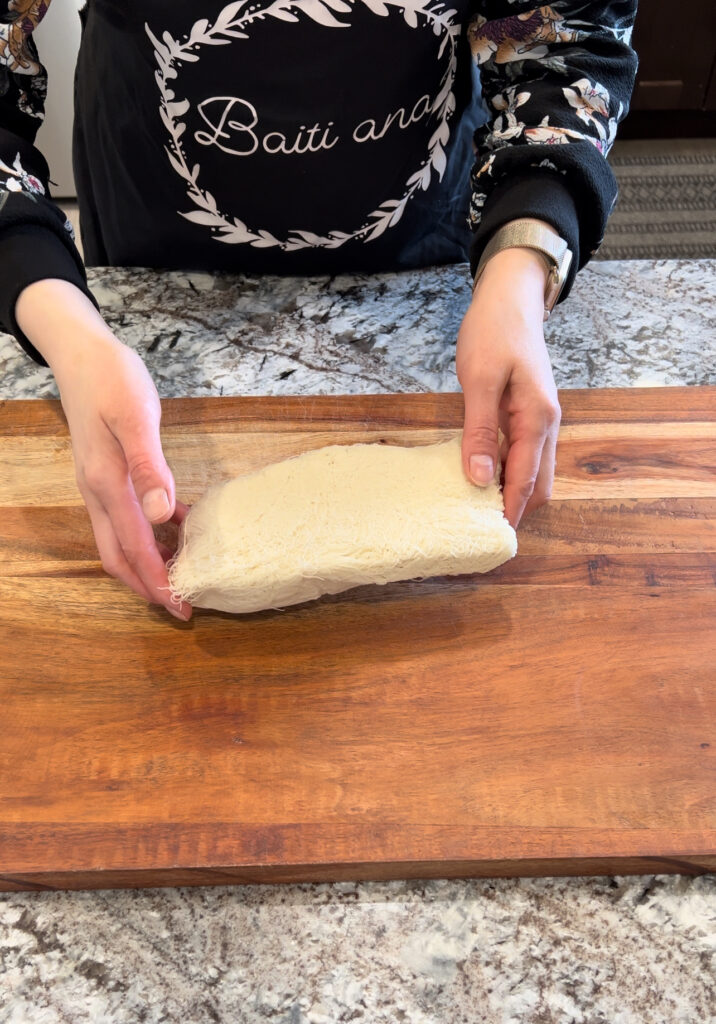
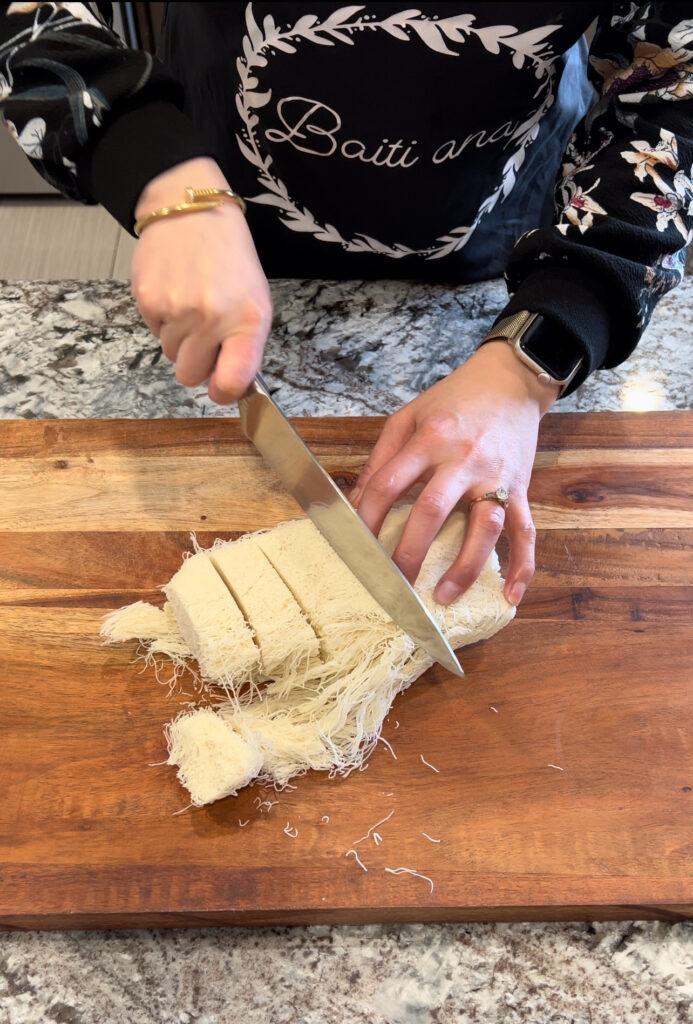
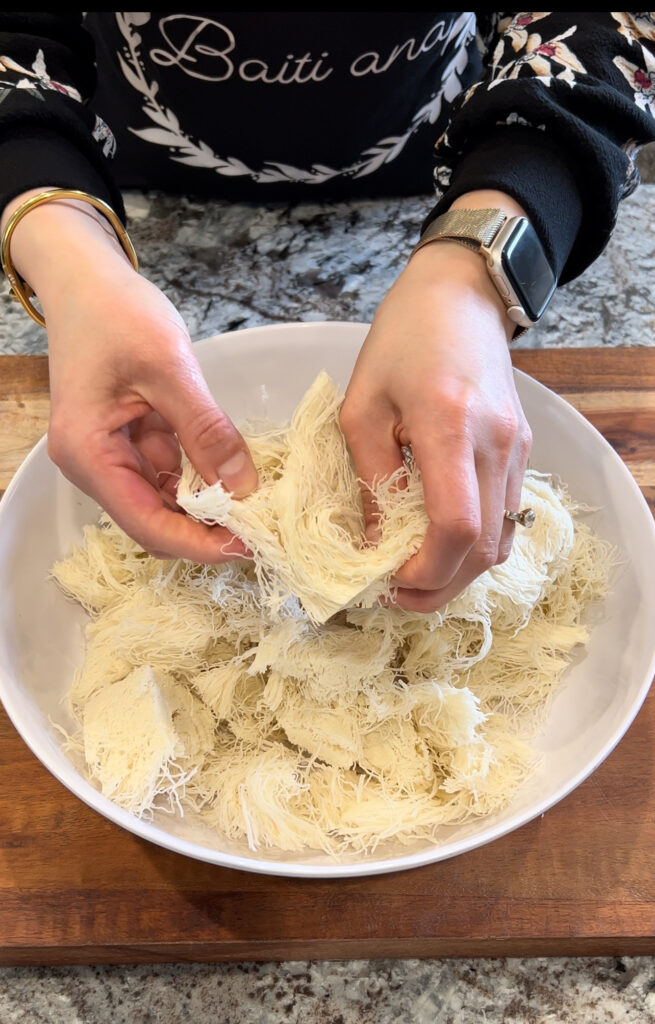
1. Cut the kataifi dough, then separate it.
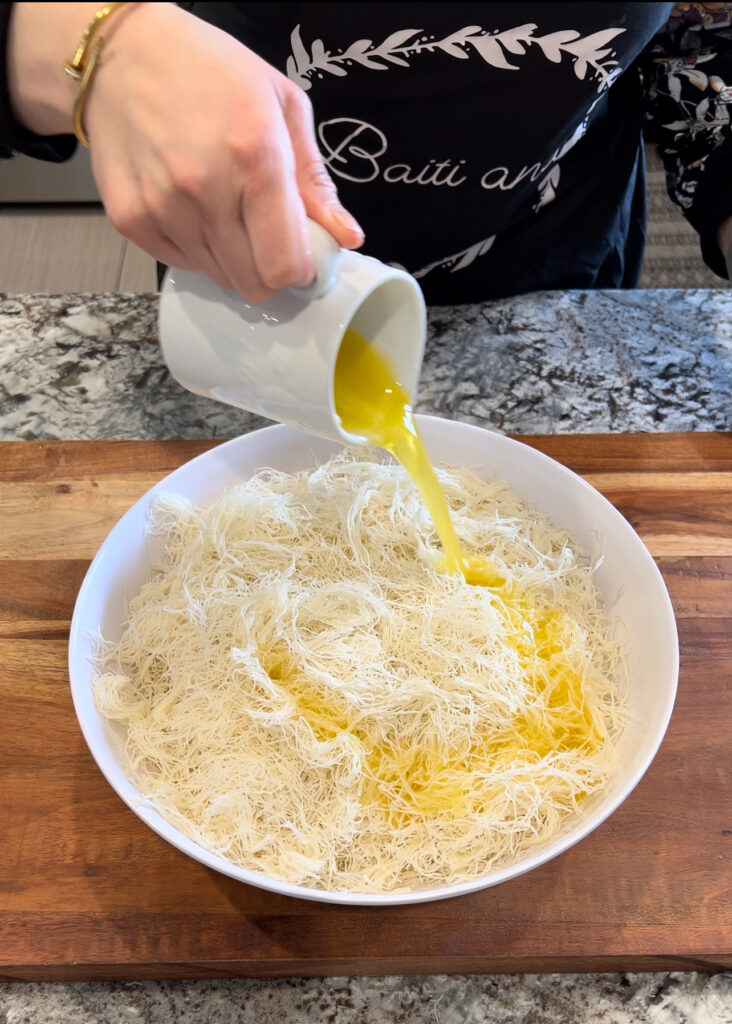
2. Add melted ghee or unsalted butter and mix well until everything is combined.

3. Start making the ashta by mixing milk, whipping cream, cornstarch, and sugar, and keep stirring to prevent sticking to the bottom.
4. When the ashta thickens, remove it from the heat and set it aside

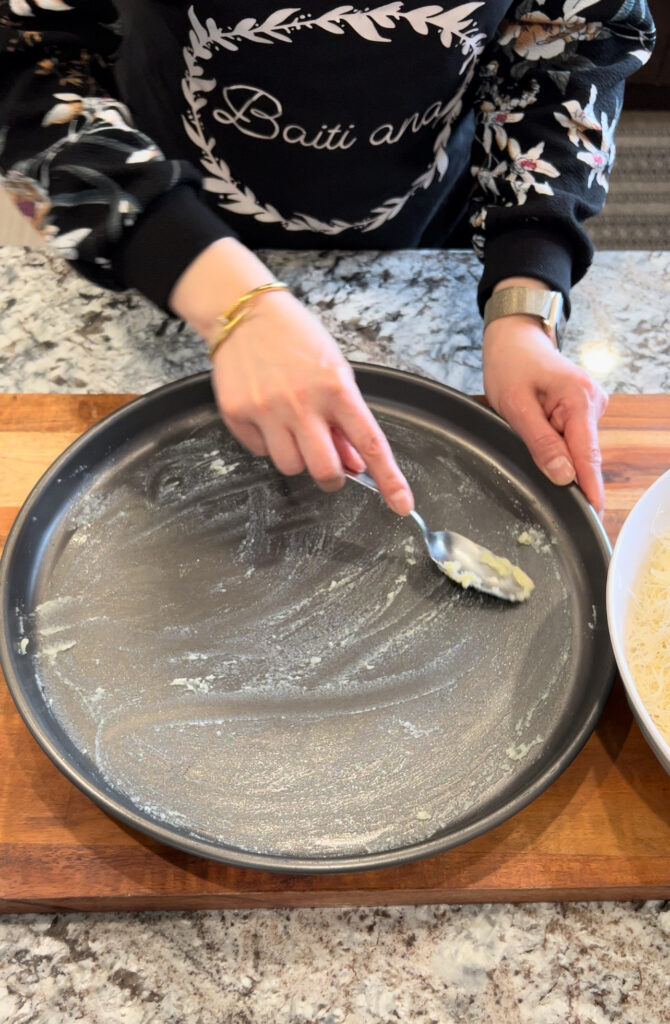
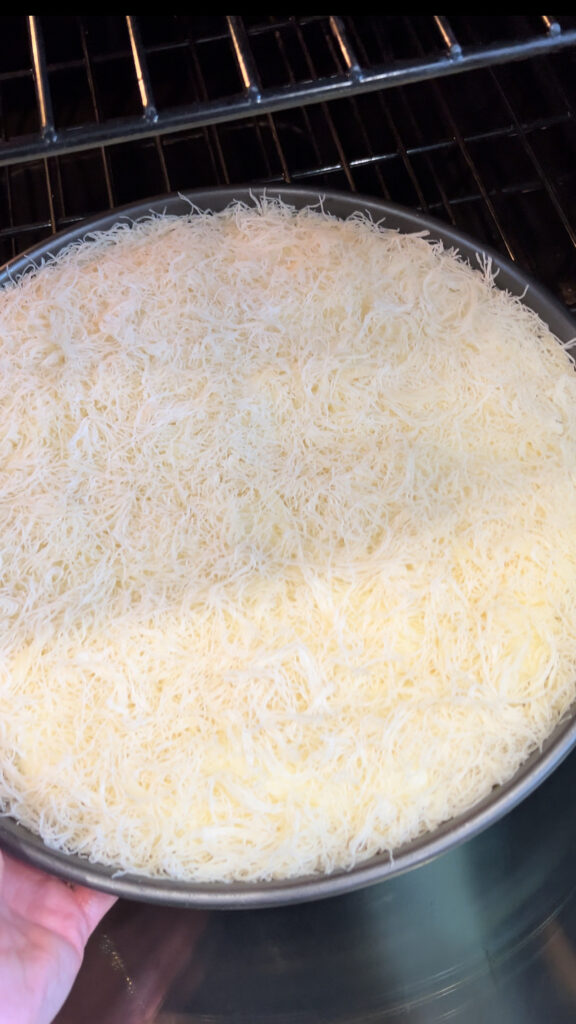
5. Brush a baking tray with ghee or butter, then add the shredded kataifi dough and press down to form an even layer.
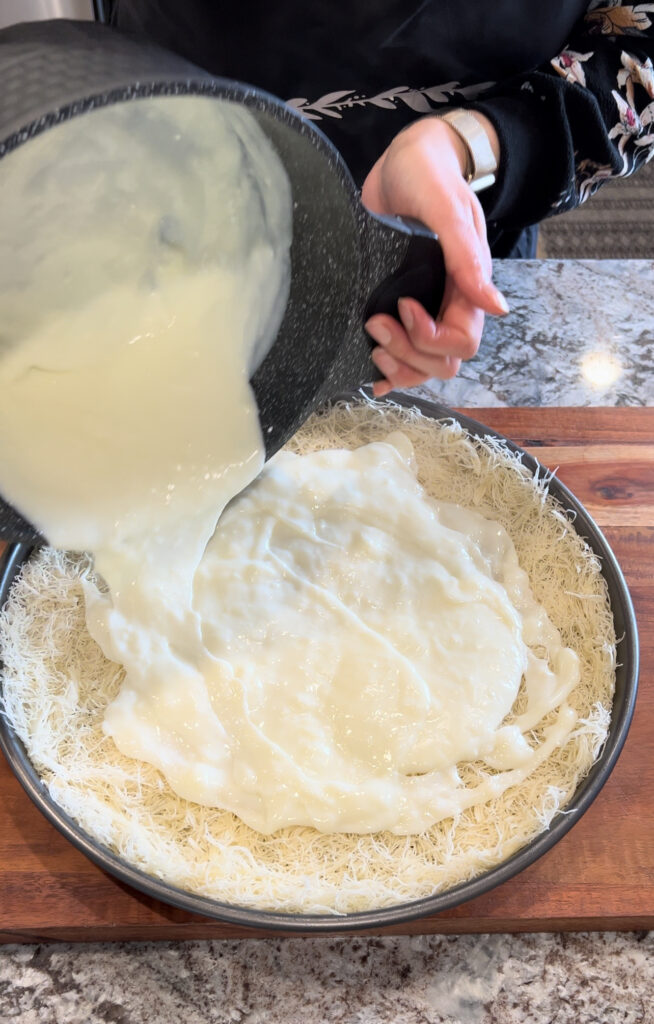
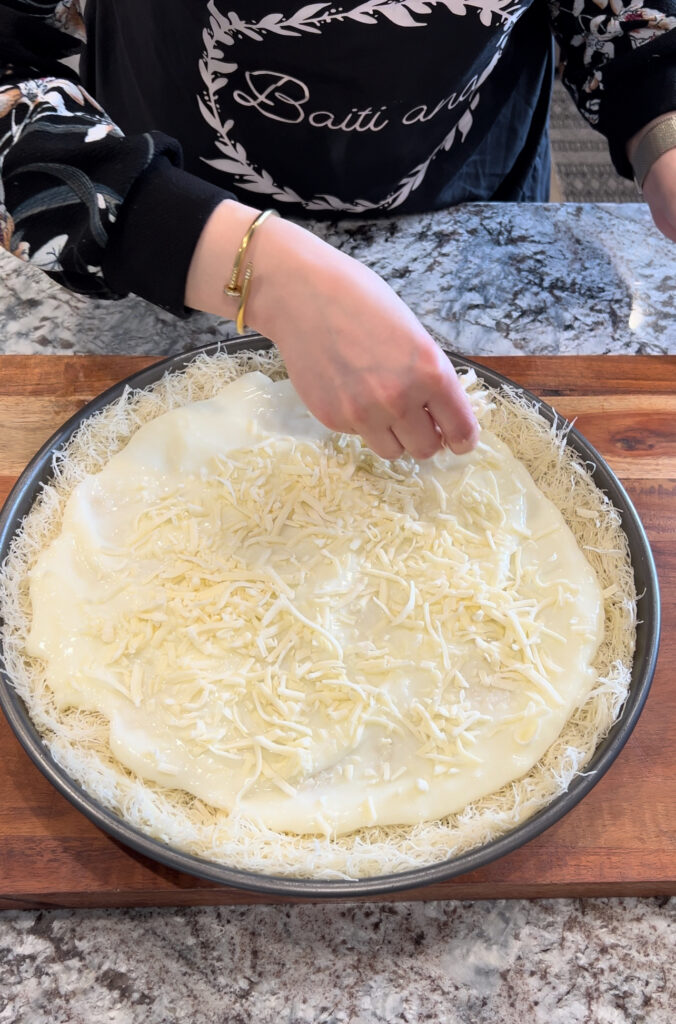
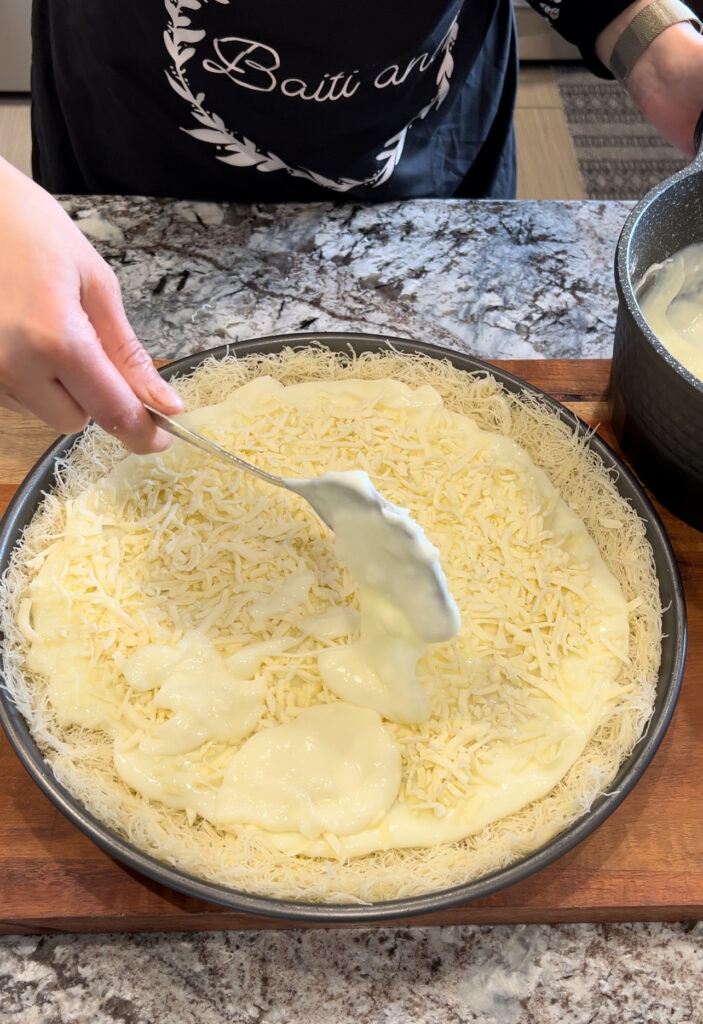
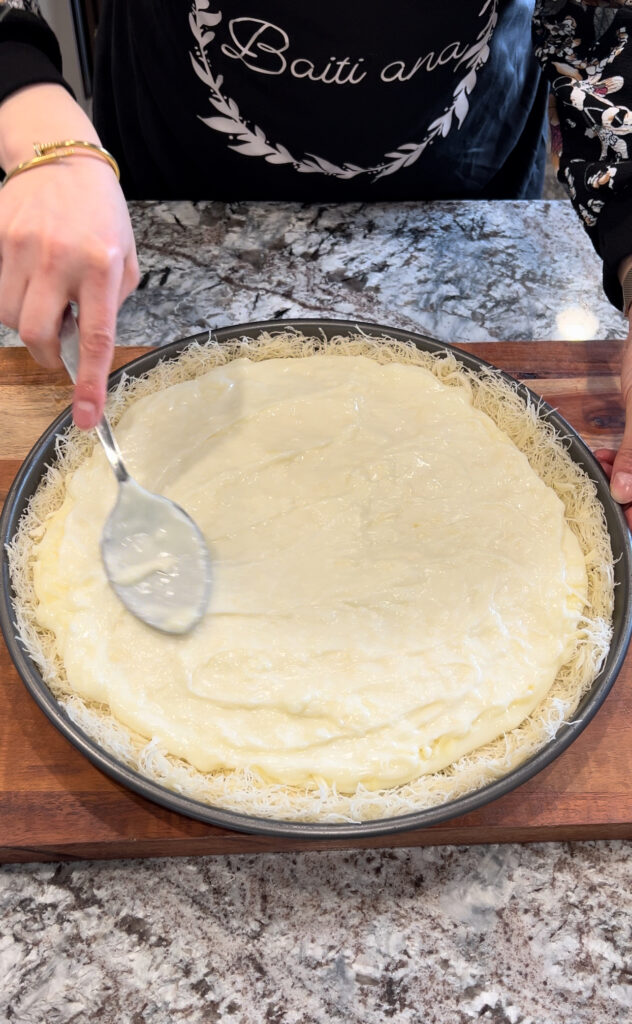
6. Add half of the ashta, then optionally add shredded mozzarella cheese, and then add the remaining ashta.
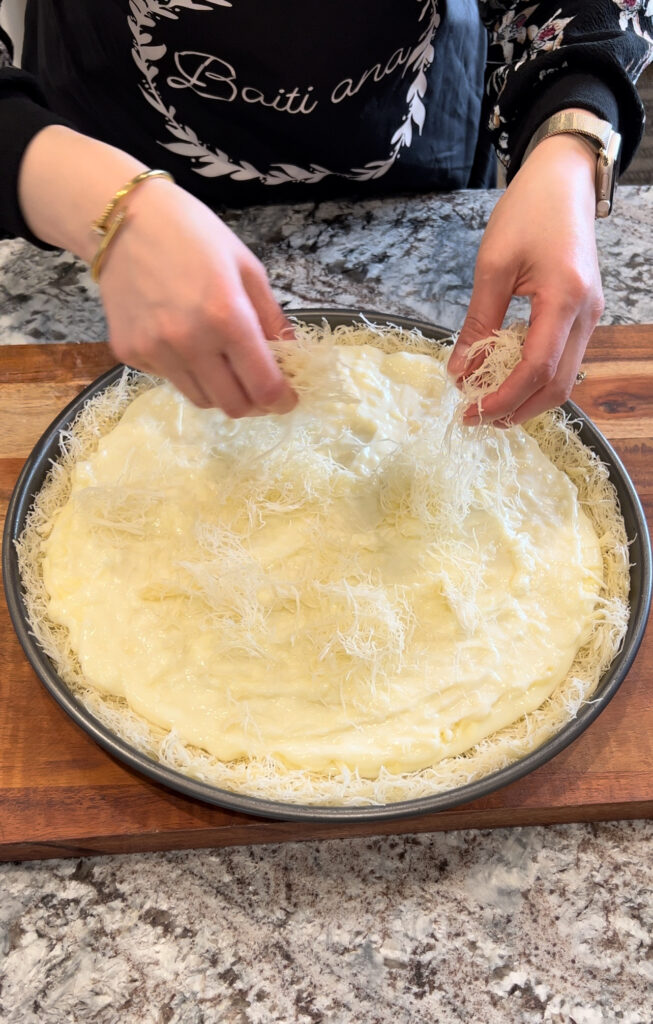
7. Add the remaining kataifi on top and press gently.
8. Bake in a preheated oven at 350°F until golden brown and crispy.
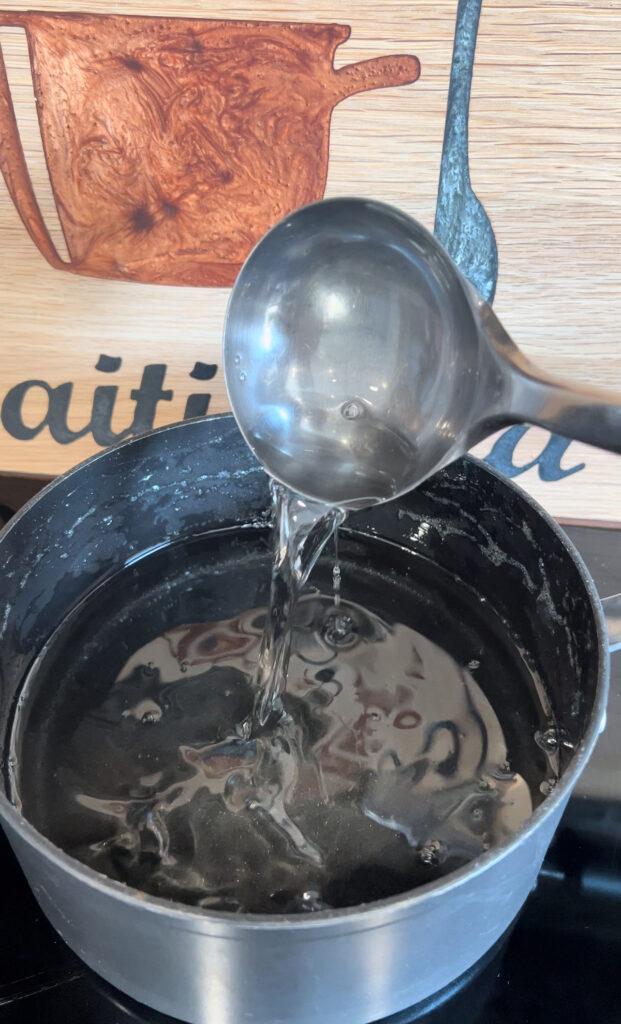
9. While it’s baking, make the simple syrup by adding sugar and water to a pot without mixing. Turn the heat to high; when it starts bubbling, lower it to medium, and add lemon juice, orange blossom water, and rose water. Let it boil for 4 minutes, then remove from the heat and let it cool down.
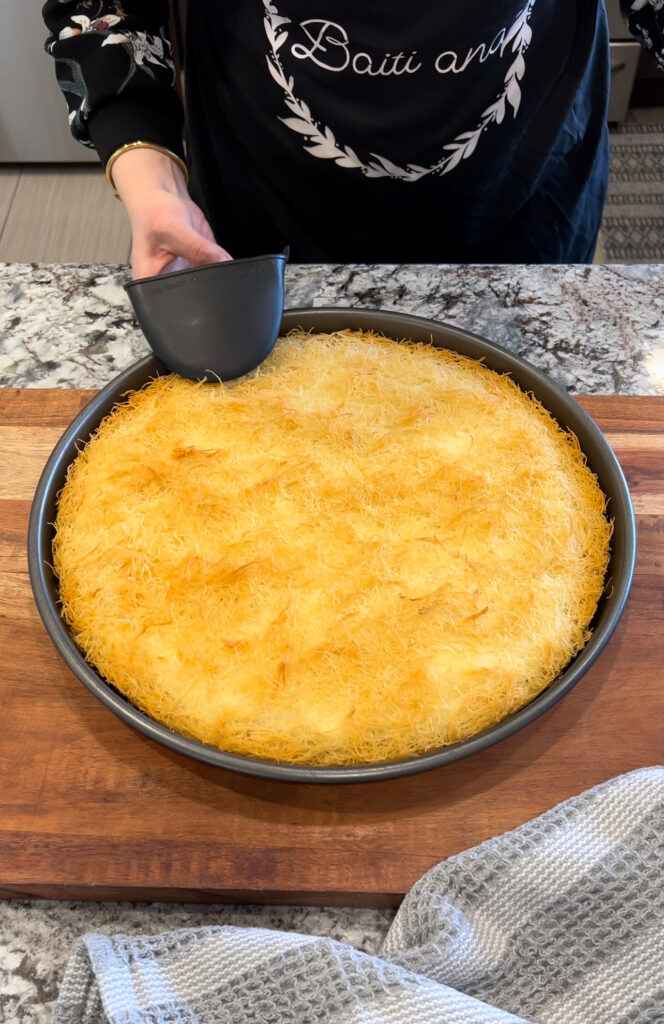
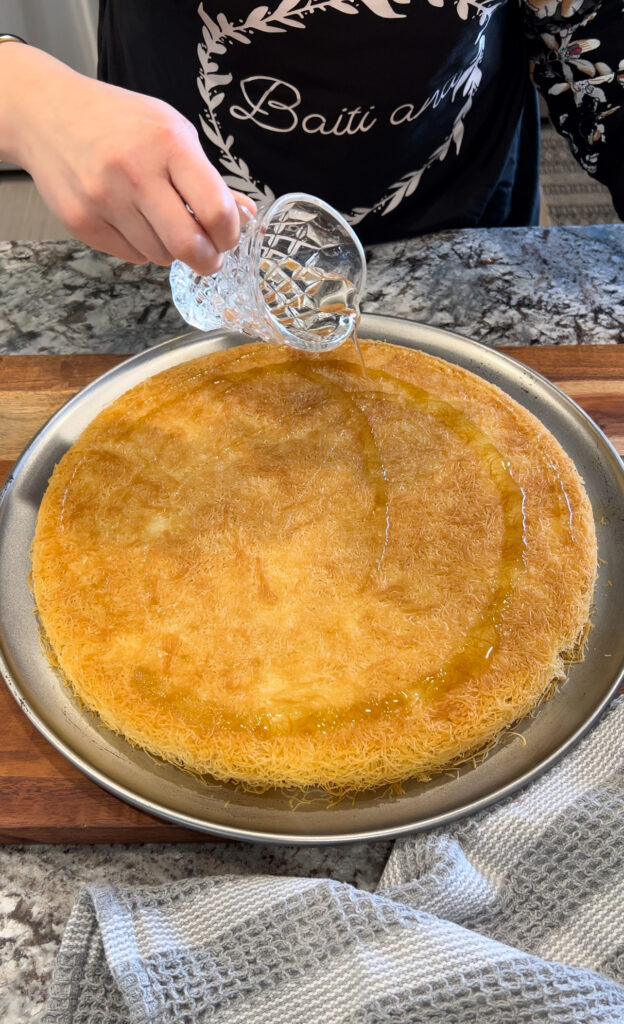
10. When the othmaliye is done, which usually takes about 45 minutes (depending on your oven), take it out and add 1/4 cup of the simple syrup.
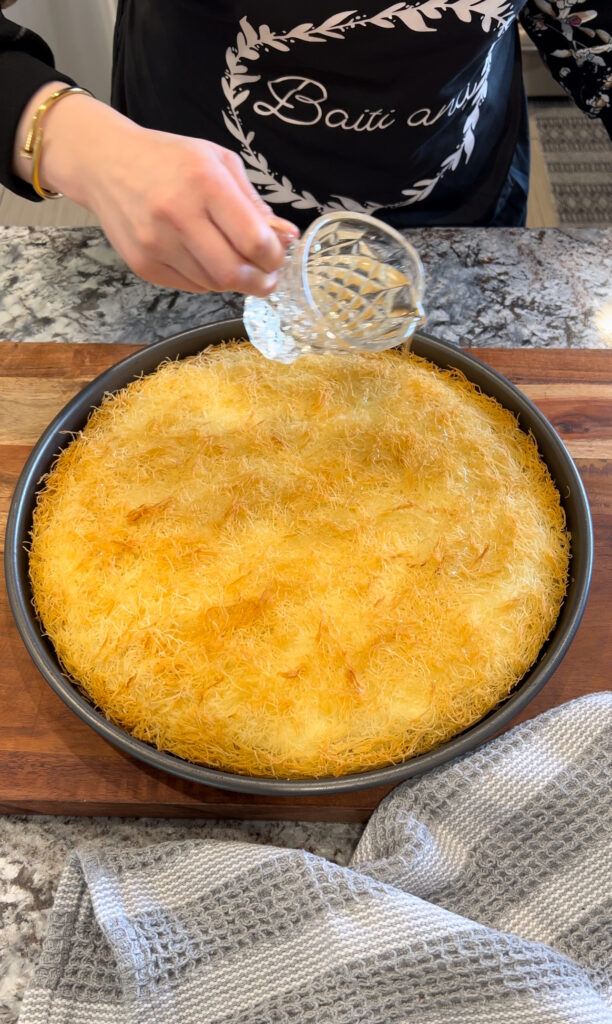
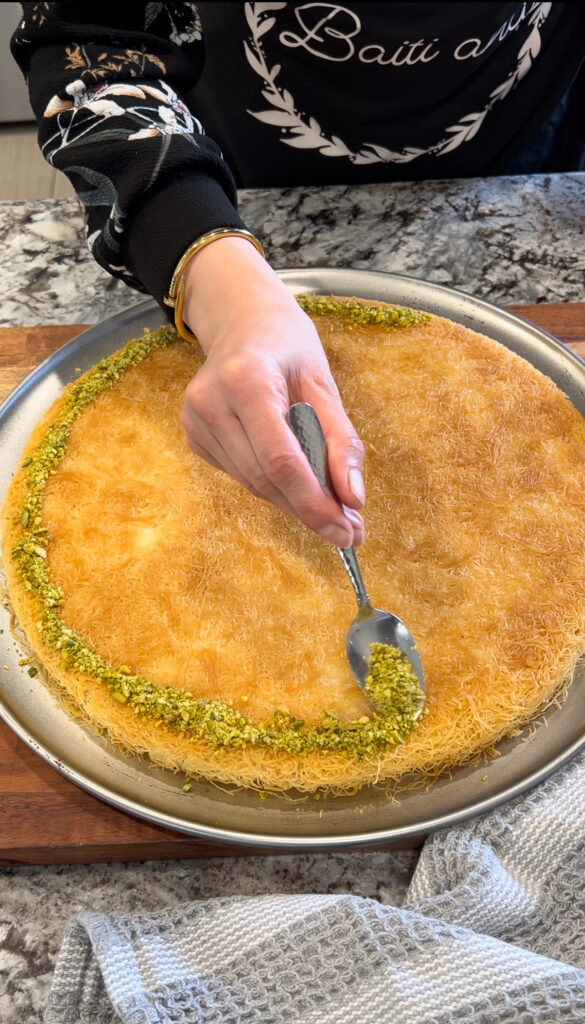
11. Flip it, then add another 1/4 cup of simple syrup or more to your liking and crushed pistachios.
12. Serve while still warm, and while serving, add more simple syrup if desired.
Tips and Tricks
- Handle Kataifi Dough Gently:
- Thaw the dough completely before use, as it tends to break if frozen.
- Fluff and separate the strands carefully to ensure even baking and a crispy texture.
- Use High-Quality Butter or Ghee:
- Opt for high-quality melted ghee or butter for the best flavor and texture.
- Brush the baking tray generously to prevent sticking and achieve a golden crust.
- Customize the Cheese:
- While mozzarella is a great choice, you can experiment with other mild, stretchy cheeses like akawi or ricotta for a unique flavor profile.
- Perfecting the Ashta:
- Stir constantly while cooking the ashta to prevent lumps or sticking.
- Let the ashta cool slightly before layering to maintain consistency.
- Layer Evenly:
- Press down the kataifi layers gently to create an even base and topping. This ensures uniform baking and a balanced texture.
- Keep an Eye on the Oven:
- Bake at 350°F and check periodically to prevent over-browning. The top should be golden and crisp.
- Master the Simple Syrup:
- Avoid stirring the sugar-water mixture while making the syrup to prevent crystallization.
- Allow the syrup to cool completely before drizzling it over the hot dessert to maintain the texture.
- Serve Immediately:
- Baked othmaliye tastes best when served warm, as the cheese is melty, and the flavors are at their peak.
- Garnish Generously:
- Add a generous sprinkle of crushed pistachios for added crunch and a pop of color. When serving, drizzle extra syrup on top.
- Make Ahead:
- Prepare the ashta and simple syrup in advance and store them in the refrigerator. When ready to serve, assemble and bake the dessert for fresh, crispy results.
Variations
- Nutty Delight: Add a layer of finely chopped nuts (e.g., walnuts, almonds, or hazelnuts) between the ashta and kataifi dough for extra crunch and richness.
- Chocolate Twist: Incorporate a drizzle of melted chocolate between the layers or as a topping for a fusion of Middle Eastern and Western flavors.
- Fruit-Infused: Add a layer of dried fruits like apricots, figs, or dates, or incorporate fresh fruits like strawberries or mango slices for a fruity touch.
- Coconut Flavor: Mix shredded coconut into the ashta or sprinkle toasted coconut flakes over the top for a tropical twist.
- Spiced Syrup: Infuse the simple syrup with cinnamon sticks, cardamom pods, or a splash of vanilla for a warm, spiced flavor.
- Rose and Pistachio Cream: Blend crushed pistachios into the ashta filling and increase the rose water for a more pronounced floral and nutty flavor.
- Savory Variation: Skip the simple syrup and increase the cheese filling for a savory version, perfect for brunch or as an appetizer.
- Mini Portions: instead of making a large tray, shape the kataifi dough into small nests or rolls, filling each with ashta and cheese for individual servings.
- Vegan Version: Replace the ashta with a vegan cream made from almond or coconut milk, use plant-based butter or ghee, and skip the cheese or opt for vegan cheese alternatives.
- Honey Drizzle: Swap the simple syrup with a drizzle of honey for a more natural sweetener and earthy flavor.
- Cream Cheese Ashta: Blend cream cheese into the ashta for a tangy twist that complements the sweetness of the dessert.
- Layered Kunafa-Style: Layer the kataifi, ashta, and cheese in multiple thin layers for a texture and flavor reminiscent of traditional kunafa.
How To Store Baked Othmaliye with Ashta and Cheese
At Room Temperature:
- If serving within a few hours, cover the othmaliye with aluminum foil or plastic wrap to prevent it from drying out.
- Avoid leaving it out for more than 4-6 hours, as the ashta filling is perishable.
In the Refrigerator:
- Allow the othmaliye to cool completely before refrigerating to prevent condensation from making the layers soggy.
- Store it in an airtight container or cover the baking dish tightly with plastic wrap.
- It will stay fresh in the refrigerator for up to 3 days.
In the Freezer:
- For longer storage, freeze the baked and cooled othmaliye. Wrap it tightly in plastic wrap and then in aluminum foil to prevent freezer burn.
- Store in the freezer for up to 2 months.
Reheating Instructions:
- Oven: For the best texture, reheat in a preheated oven at 300°F (150°C) for 10-15 minutes, or until warmed through and crispy.
- Microwave: Reheat individual portions for 30-60 seconds. While faster, this method may soften the crispness of the kataifi.
Simple Syrup Tip: Add a drizzle of fresh simple syrup after reheating to restore moisture and enhance the flavor.
Frequently Asked Questions
Yes! You can make a vegan version by substituting the ashta with a dairy-free cream made from coconut or almond milk, using plant-based butter or ghee, and opting for vegan cheese if desired.
Absolutely! The cheese is optional, but it adds a lovely creaminess and savory flavor. If you prefer a lighter dessert or a more traditional taste, you can omit it and still enjoy a delicious othmaliye.
The othmaliye is ready when it turns a deep golden brown and the kataifi dough is crispy. The filling should also be set but still creamy. You can test it by gently pressing the top; it should be firm but not hard.
Other Recipes to Try
Baked Othmaliye with Ashta and Cheese
Ingredients
- 1 pack kataifi shredded dough (454g)
- 1 cup melted ghee or unsalted butter +2 tbsp to brush thetray
- 1 cup shredded mozzarella cheese (or more if you prefer it extra cheesy)
- ¼ cup crushed pistachios
- simple syrup
Ashta ingredients
- 2 cups milk
- 2 cups whipping cream
- 8 tablespoons cornstarch
- ⅓ cup sugar
- 2 teaspoons rose water
- 2 teaspoons orange blossom water
Simple Syrup Ingredients:
- 2 cups sugar
- 1 cup water
- 2 teaspoons lemon juice
- 1 teaspoon rose water
- 1 teaspoon orange blossom water
Instructions
- Cut the kataifi dough, then separate it.
- Add melted ghee or unsalted butter and mix well until everything is combined.
- Start making the ashta by mixing milk, whipping cream, corn starch, sugar, and keep stirring to prevent sticking to the bottom.
- When the ashta thickens, remove it from the heat and set it aside
- Brush a baking tray with ghee or butter, then add the shredded kataifi dough and press down to form an even layer.
- Add half of the ashta, then optionally add shredded mozzarella cheese, and then add the remaining ashta.
- Add the remaining kataifi on top and press gently.
- Bake in a preheated oven at 350°F until golden brown and crispy.
- While it’s baking, make the simple syrup by adding sugar and water to a pot without mixing. Turn the heat to high; when it starts bubbling, lower it to medium, and add lemon juice, orange blossom water, and rose water. Let it boil for 4 minutes, then remove from the heat and let it cool down.
- While it’s baking, make the simple syrup by adding sugar and water to a pot without mixing. Turn the heat to high; when it starts bubbling, lower it to medium, and add lemon juice, orange blossom water, and rose water. Let it boil for 4 minutes, then remove from the heat and let it cool down.
- Flip it, then add another 1/4 cup of simple syrup or more to your liking and crushed pistachios.
- Serve while still warm, and while serving, add more simple syrup if desired.
Notes
- Handle Kataifi Dough Gently:
- Thaw the dough completely before use, as it tends to break if frozen.
- Fluff and separate the strands carefully to ensure even baking and a crispy texture.
- Use High-Quality Butter or Ghee:
- Opt for high-quality melted ghee or butter for the best flavor and texture.
- Brush the baking tray generously to prevent sticking and achieve a golden crust.
- Customize the Cheese:
- While mozzarella is a great choice, you can experiment with other mild, stretchy cheeses like akawi or ricotta for a unique flavor profile.
- Perfecting the Ashta:
- Stir constantly while cooking the ashta to prevent lumps or sticking.
- Let the ashta cool slightly before layering to maintain consistency.
- Layer Evenly:
- Press down the kataifi layers gently to create an even base and topping. This ensures uniform baking and a balanced texture.
- Keep an Eye on the Oven:
- Bake at 350°F and check periodically to prevent over-browning. The top should be golden and crisp.
- Master the Simple Syrup:
- Avoid stirring the sugar-water mixture while making the syrup to prevent crystallization.
- Allow the syrup to cool completely before drizzling it over the hot dessert to maintain the texture.
- Serve Immediately:
- Baked othmaliye tastes best when served warm, as the cheese is melty, and the flavors are at their peak.
- Garnish Generously:
- Add a generous sprinkle of crushed pistachios for added crunch and a pop of color. When serving, drizzle extra syrup on top.
- Make Ahead:
- Prepare the ashta and simple syrup in advance and store them in the refrigerator. When ready to serve, assemble and bake the dessert for fresh, crispy results.