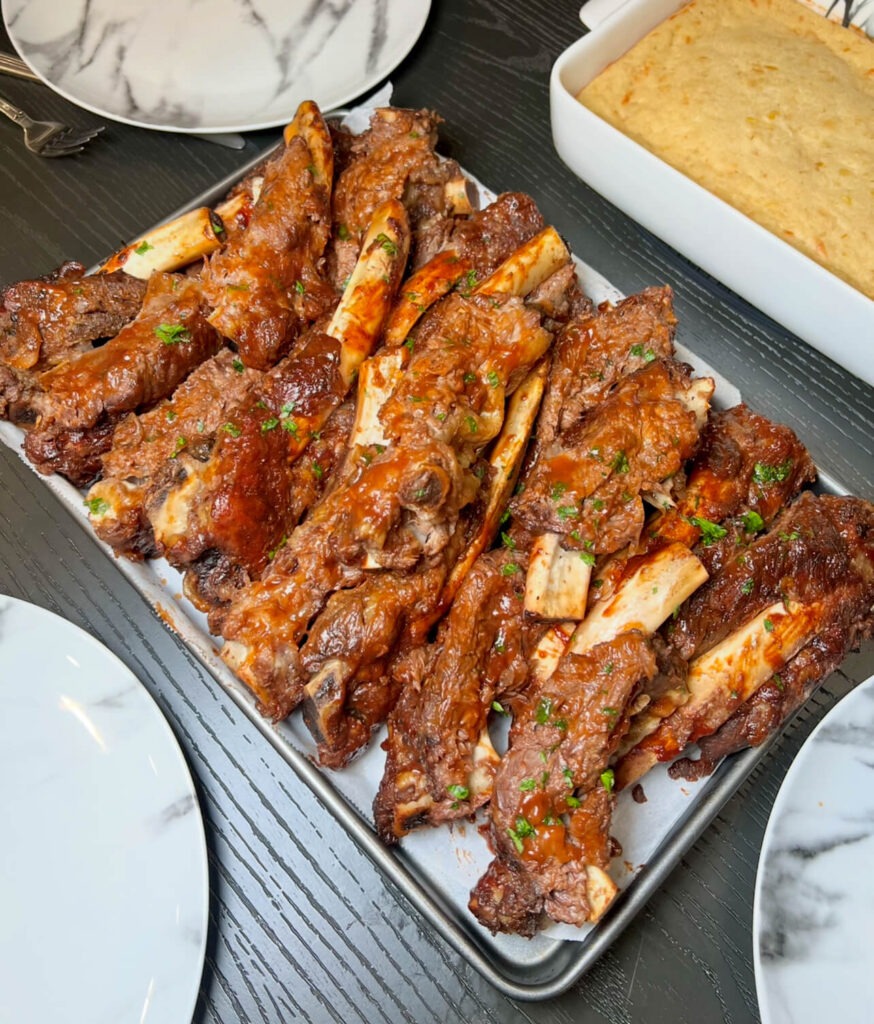
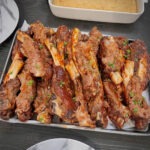
Beef Back Ribs are one of my favorite things to make, and over the years I’ve perfected a method that gives you ribs that are melt-in-your-mouth tender, juicy, and packed with flavor every single time. I love cooking my ribs in the oven because the flavor stays in, the meat becomes incredibly soft, and you never have to worry about them drying out.
I’ve been using this recipe and method for years. I used to finish my ribs on the BBQ for a few minutes after baking—brushing them with BBQ sauce and grilling them just long enough to get that smoky charcoal flavor. It’s still a great option if you love that grill taste. But honestly, I now do it all in the oven. A quick broil at the end gives you that perfect crispy, caramelized finish without needing the grill at all.
Whether you choose to finish them on the BBQ or keep everything in the oven, this method guarantees ribs that come out flavorful, fall-apart tender, and absolutely delicious every time.
Beef back ribs summary
Flavor:
Rich, smoky, and deeply seasoned with a blend of BBQ sauce, brown sugar, and spices. Every bite is sweet, tangy, and packed with bold barbecue flavor.
Texture:
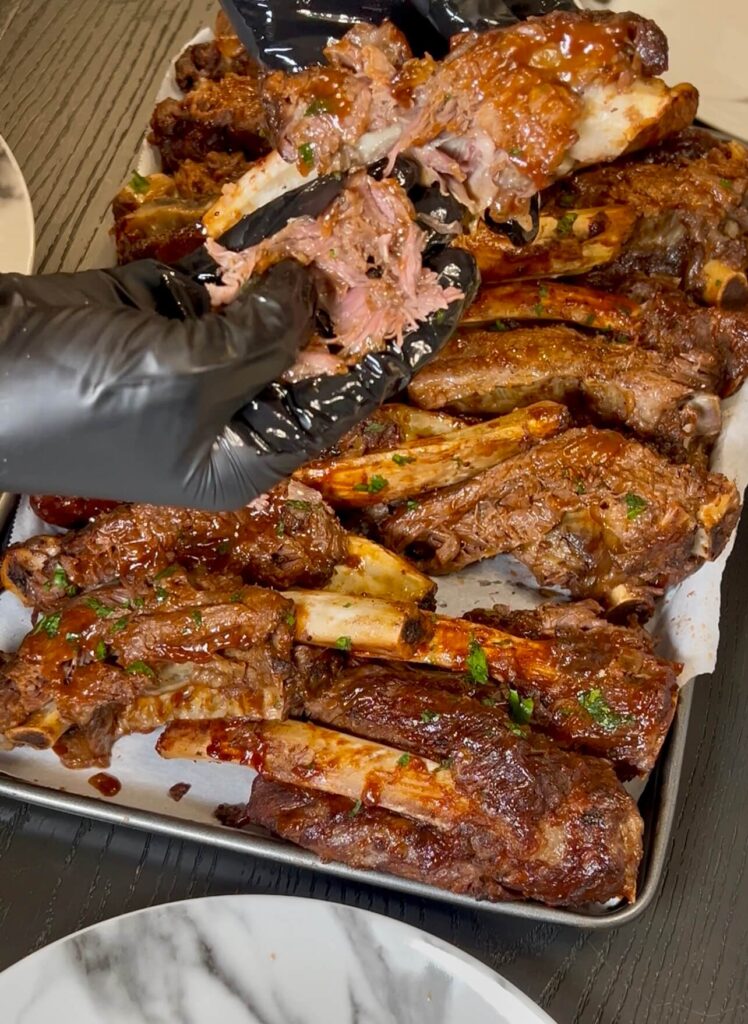
Melt-in-your-mouth tender, juicy ribs that fall off the bone, with a perfectly caramelized and slightly crispy exterior after broiling or grilling.
Cooking Time:
About 3–3.5 hours total, depending on the thickness of the ribs. Slow-cooked in the oven for maximum tenderness.
Difficulty:
Easy — most of the work is hands-off while the ribs bake slowly in the oven.
Method: Oven-baked low and slow, then finished under the broiler (or on the BBQ) for that perfect charred, sticky glaze.
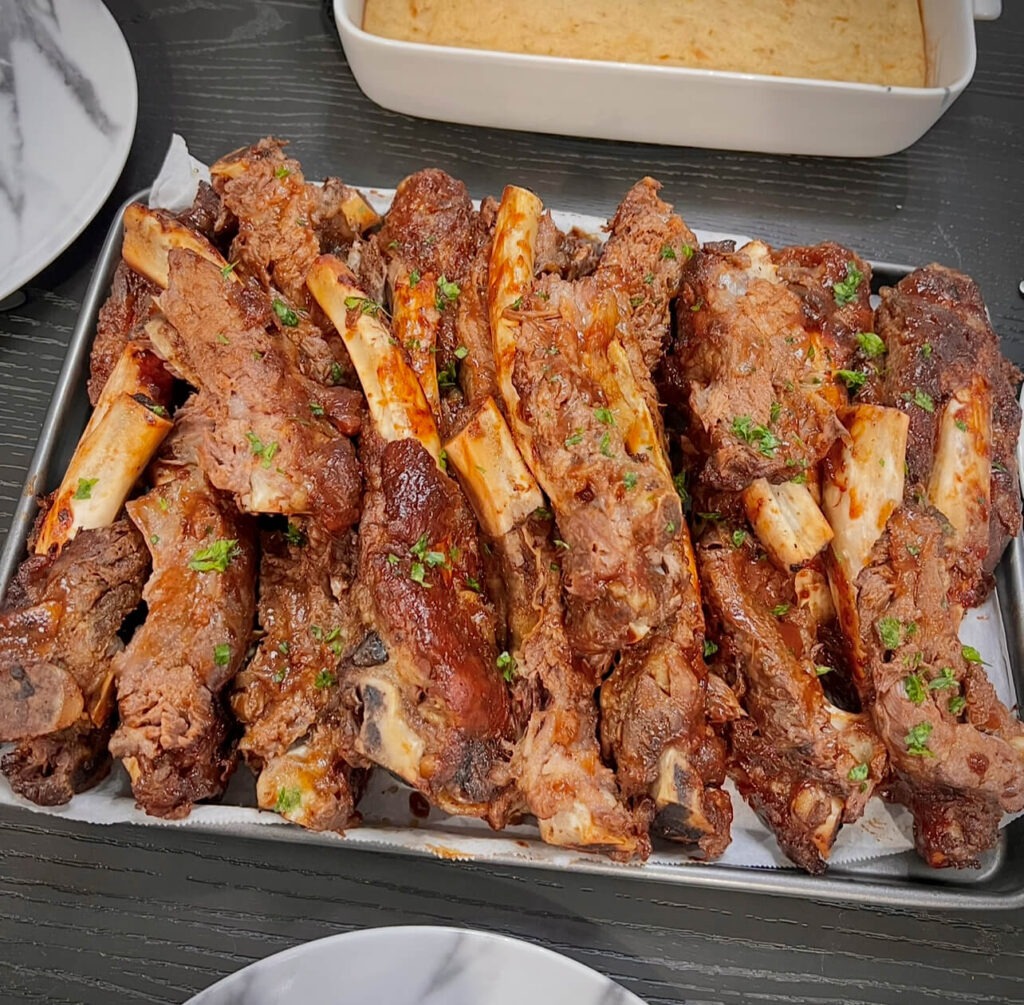
Best Served With: Mashed potatoes, roasted veggies, coleslaw, corn on the cob, or extra BBQ sauce on the side.
Perfect For: Family dinners, weekend meals, gatherings, or anytime you want restaurant-quality ribs at home with minimal effort.
Beef back ribs ingredients
Beef back ribs – The star of the dish, naturally flavorful and perfect for slow cooking until tender.
Hot water – Helps create steam in the pan to keep the ribs juicy and prevent them from drying out.
Parchment paper and foil – Seal in moisture and heat, ensuring the ribs cook evenly and stay incredibly soft.
BBQ sauce – Adds sweetness, smokiness, and that classic barbecue flavor that coats the ribs beautifully.
Brown sugar – Enhances the sweetness and helps caramelize the sauce for a sticky, delicious finish.
Paprika – Adds warmth, color, and a mild smoky flavor to the seasoning mix.
Garlic powder – Brings a deep, savory garlic flavor that complements the BBQ sauce.
Onion powder – Adds sweetness and enhances the overall depth of the seasoning.
Salt – Brings out the natural flavors of the meat and balances the seasoning blend.
Black pepper – Adds a mild kick and rounds out the spice mix perfectly.
How to make beef back ribs?
Step 1: Prepare the ribs
Open the ribs, rinse them if needed, and pat them completely dry with a paper towel.
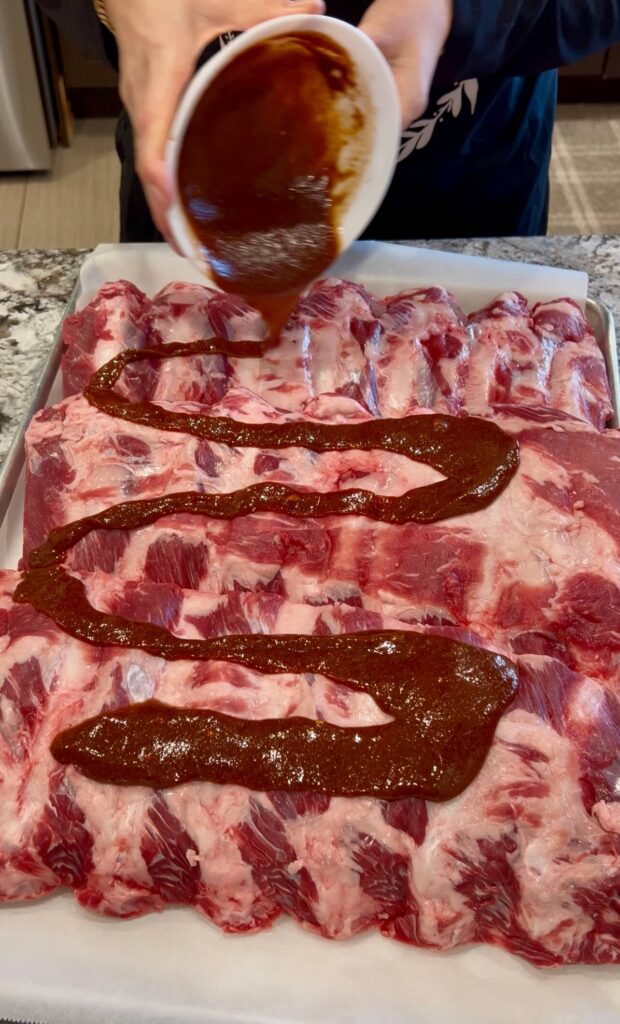
Step 2: Make the sauce mix
In a bowl, combine the BBQ sauce, brown sugar, and all the spices until you have a smooth, flavorful mixture.
Step 3: Line your baking tray
Place parchment paper on the bottom of the tray to keep the ribs moist and prevent sticking.
Step 4: Add the ribs and coat them
Place the ribs on the tray and pour the sauce over them, rubbing it all around so every part is coated evenly.
Step 5: Add hot water
Pour hot water into the bottom of the tray to help steam the ribs and keep them juicy during baking.
Step 6: Cover tightly
Place another piece of parchment paper over the ribs, then cover the whole tray tightly with foil to trap all the moisture and flavor inside.
Step 7: Bake low and slow
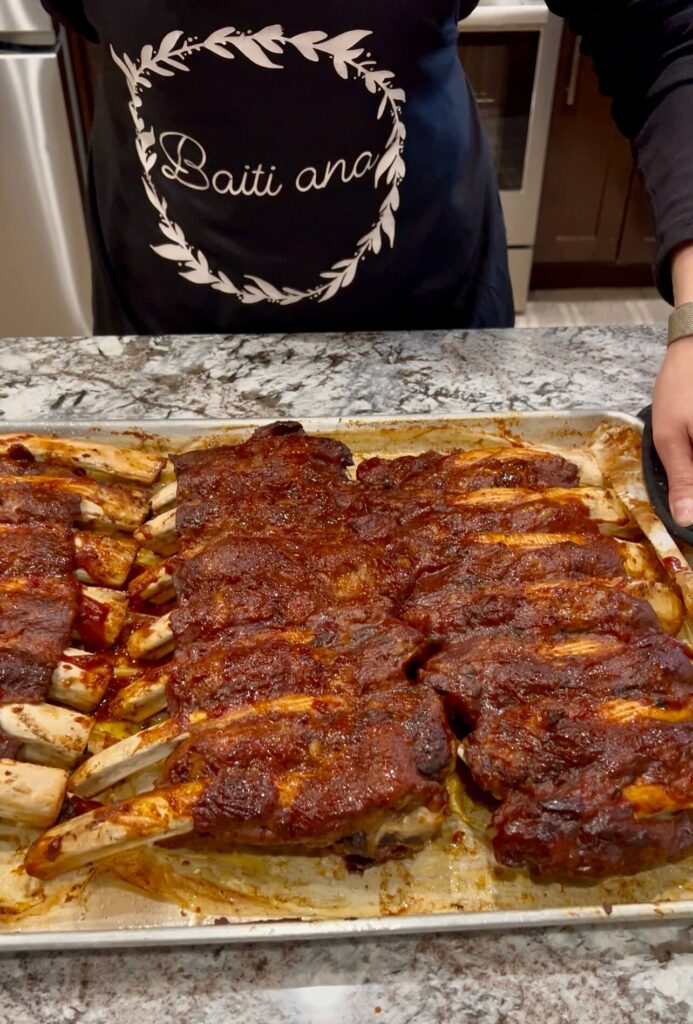
Preheat the oven to 350°F (175°C). Bake the ribs for at least 3 hours, checking at the 3-hour mark. Cooking time may vary depending on thickness, but they should be tender and pull apart easily.
Step 8: Drain and sauce again
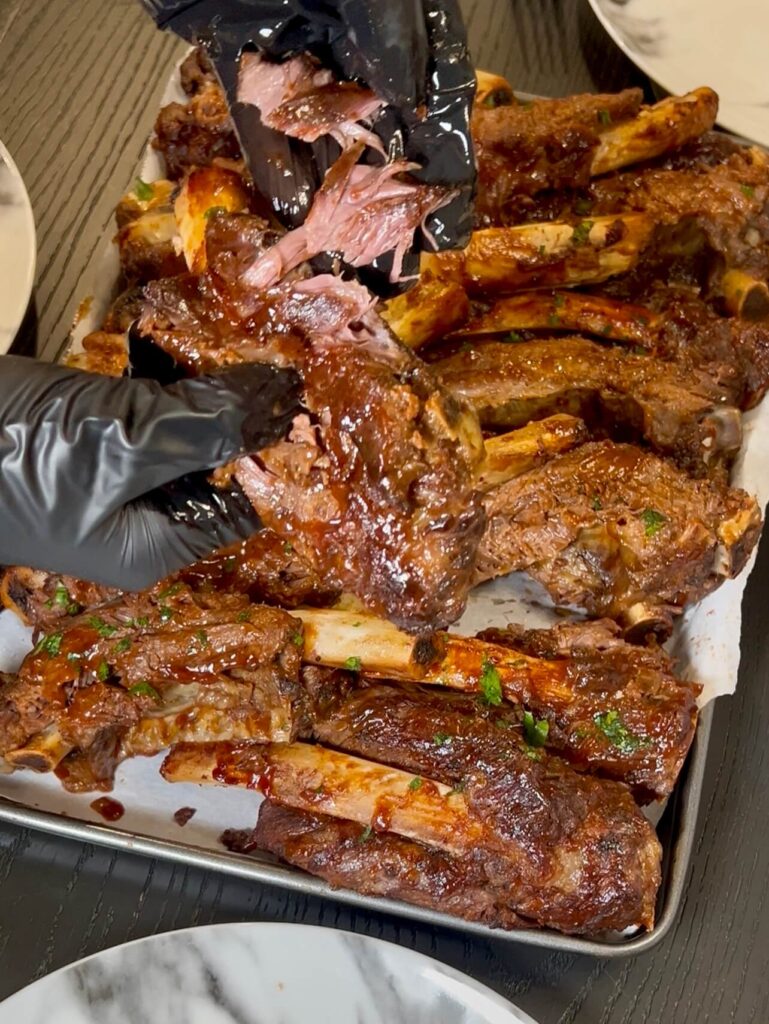
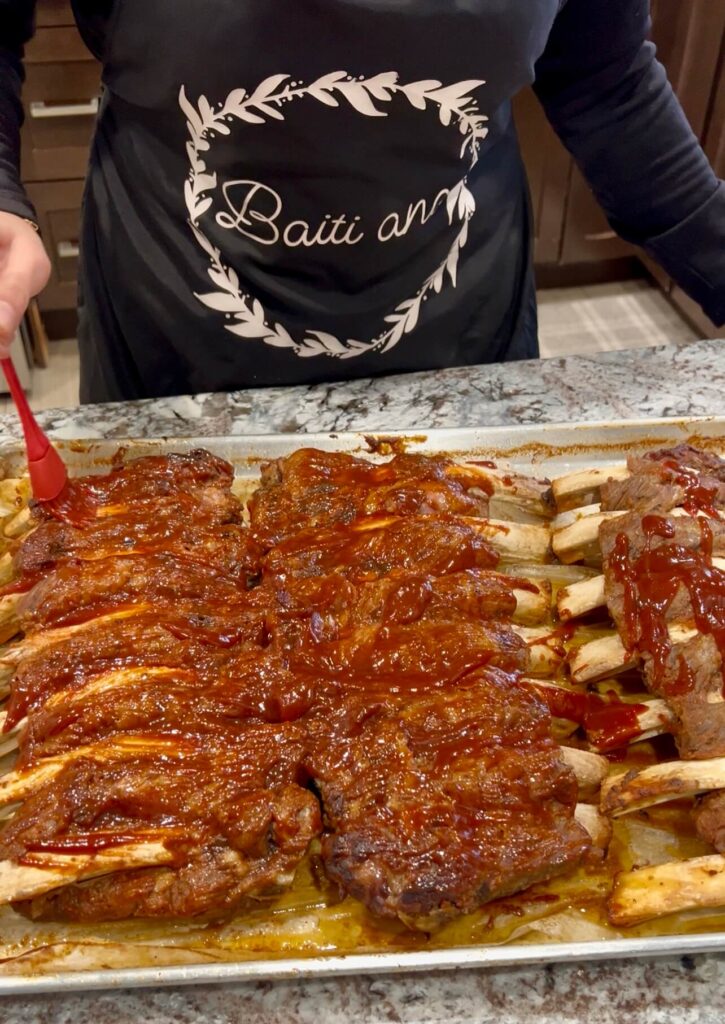
Remove the tray from the oven, drain any extra liquid, and brush the ribs with more BBQ sauce.
Step 9: Crisp the outside
Place the ribs on the top rack and broil just until the outside becomes caramelized and slightly crispy. (You can also grill them for a few minutes if you prefer a smoky finish.)
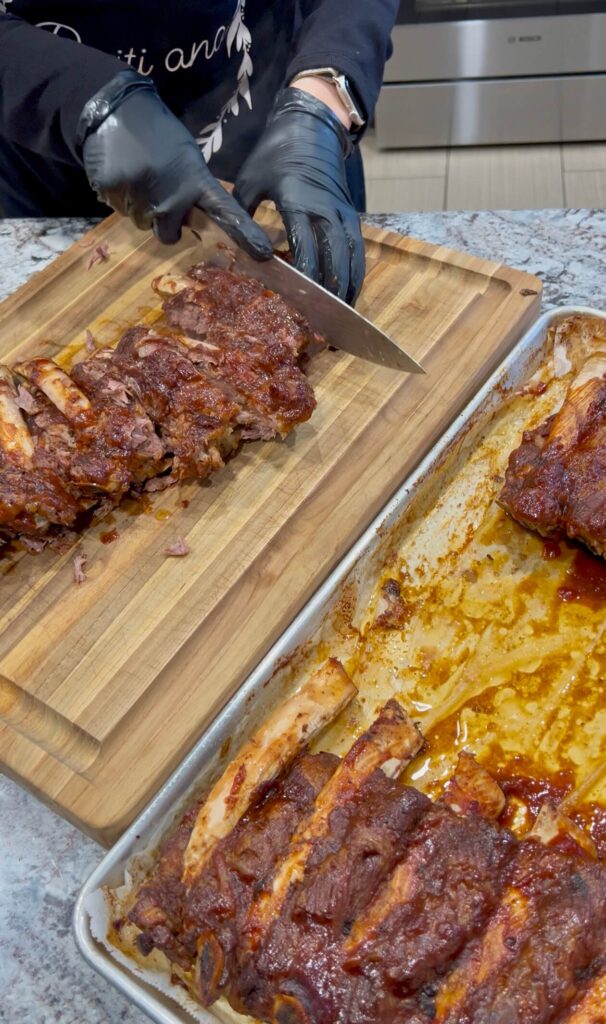
Step 10: Serve
Slice and serve the ribs hot with mashed potatoes, veggies, or extra BBQ sauce on the side.

Different cooking methods for Beef back ribs
1. Oven-Baked (My Favorite)
Baking the ribs low and slow keeps them tender, juicy, and full of flavor; then a quick broil at the end gives them that perfect caramelized crust.
2. Smoker
Cooking the ribs in a smoker infuses them with deep, smoky flavor while slowly breaking down the meat until it becomes tender and incredibly flavorful.
3. Boiled Then Baked
Boiling the ribs first in seasoned water helps soften the meat and reduce cooking time; then baking or broiling them with sauce adds the caramelized finish and flavor.
4. Slow Cooker
Placing the ribs in a slow cooker gives you fall-off-the-bone tenderness with almost no effort; finish them in the oven to crisp up the outside.
5. Instant Pot
Pressure-cooking the ribs gives you very tender meat in a fraction of the time; broil afterward to create that delicious sticky BBQ-style crust.
Storage and Reheating
In the Fridge:
Let the ribs cool completely, then store them in an airtight container or wrap them tightly in foil. They stay fresh for up to 3–4 days.
In the Freezer:
For longer storage, place the cooled ribs in freezer-safe bags or containers. Remove as much air as possible to prevent freezer burn. They keep well for up to 3 months.
Reheating:
- Oven (best method): Place ribs in a covered dish, add a splash of water or sauce, and heat at 300°F until warmed through.
- Air Fryer: Reheat at 350°F for a few minutes to warm and re-crisp the edges.
- Microwave: Heat in short intervals, covered, to keep moisture in—best for small portions.
Frequently asked questions
1. Can I use beef short ribs instead of beef back ribs?
Yes, but the cooking time may change. Short ribs are thicker and fattier, so they often need a bit more time in the oven to become tender.
2. Do I have to rinse the ribs before cooking?
Rinsing is optional. Some people prefer rinsing to remove any bone fragments, but you can skip it if you prefer—just pat dry before seasoning.
3. Can I make the ribs ahead of time?
Absolutely! You can cook them fully, store them in the fridge, and reheat before serving. They taste even better the next day.
4. Why do we add hot water to the tray?
The water helps keep the ribs moist while baking and creates steam, which makes the meat extra tender.
5. Can I cook these ribs without BBQ sauce?
Yes! You can season them with dry spices only or use any sauce you love
Tips and Tricks
- Pat the ribs dry: Drying the ribs before cooking helps the seasoning stick and prevents them from steaming too much.
- Add hot water: Pouring hot water into the tray keeps the ribs juicy and tender during slow baking.
- Cover tightly: Using parchment paper and foil traps moisture, ensuring the meat cooks evenly and stays soft.
- Broil for crispiness: Finish under the broiler to caramelize the outside and create a slightly crispy crust.
- Optional grill finish: If you love smoky, charred flavor, briefly grill the ribs after baking or broiling.
- Check doneness: Ribs are ready when the meat is tender and pulls away from the bone easily.
- Make ahead: Cook the ribs ahead of time and reheat in the oven or on the grill — flavor improves as it rests.
- Customize the seasoning: Adjust salt, pepper, or spices to your taste, or experiment with smoky paprika, cayenne, or garlic powder.
- Use a thermometer: For precise cooking, check the internal temperature; tender ribs are usually around 190–203°F (88–95°C).
More recipes to try
Steak with mushroom gravy sauce
Beef back ribs
Ingredients
For the ribs:
- 3 to 4 kg beef back ribs
- 1 cup hot water
- Parchment paper and aluminum foil for covering
- BBQ sauce choose your favorite; mine are Tony Roma’s or Bull’sEye Blazing Chipotle BBQ sauce
For the sauce mix:
- 1 cup BBQ sauce
- 1/4 cup brown sugar
- 1 tbsp paprika
- 1 tbsp garlic powder
- 1 tbsp onion powder
- 1 tbsp salt
- 1/2 tbsp black pepper
Instructions
- Prepare the ribs: Open the ribs, rinse under cold water if needed, and pat dry with a paper towel.
- Make the sauce: In a bowl, mix together all the sauce ingredients.
- Line the tray: Place parchment paper in the baking tray (this keeps ribs moist and prevents sticking).
- Add ribs and sauce: Place the ribs in the tray. Pour the sauce over the ribs and rub it all around to coat evenly.
- Add water: Pour hot water into the bottom of the tray to keep the ribs moist.
- Cover: Place another layer of parchment paper over the ribs, then cover tightly with aluminum foil to trap the steam and fat.
- Bake: Preheat the oven to 350°F (175°C). Bake the ribs for at least 3 hours. Check at 3 hours — cooking time may vary depending on the thickness of your ribs.
- Finish the ribs: Remove from the oven, drain any excess liquid, then brush with BBQ sauce as desired.
- Crisp the outside: Move the ribs to the top rack and broil just until the outside becomes crispy.
- Serve: Serve the ribs hot with mashed potatoes and extra BBQ sauce.
Notes
- Rib choice: Beef back ribs work best for this recipe, but short ribs or other cuts can be used—just adjust cooking time.
- Water is key: Adding hot water to the tray keeps the ribs moist while baking.
- Broil or grill finish: Broiling at the end gives a crispy, caramelized exterior; alternatively, a quick grill adds smoky flavor.
- Sauce options: Use your favorite BBQ sauce or experiment with different glazes and marinades.
- Make ahead: Cook the ribs in advance and reheat before serving—they stay juicy and flavorful.
- Storage: Refrigerate for up to 3–4 days or freeze for up to 3 months. Reheat gently to preserve moisture.
- Check doneness: Ribs are tender and ready when the meat easily pulls away from the bone.
- Adjust seasoning: Feel free to increase or decrease spices, sugar, or salt according to your taste preference.