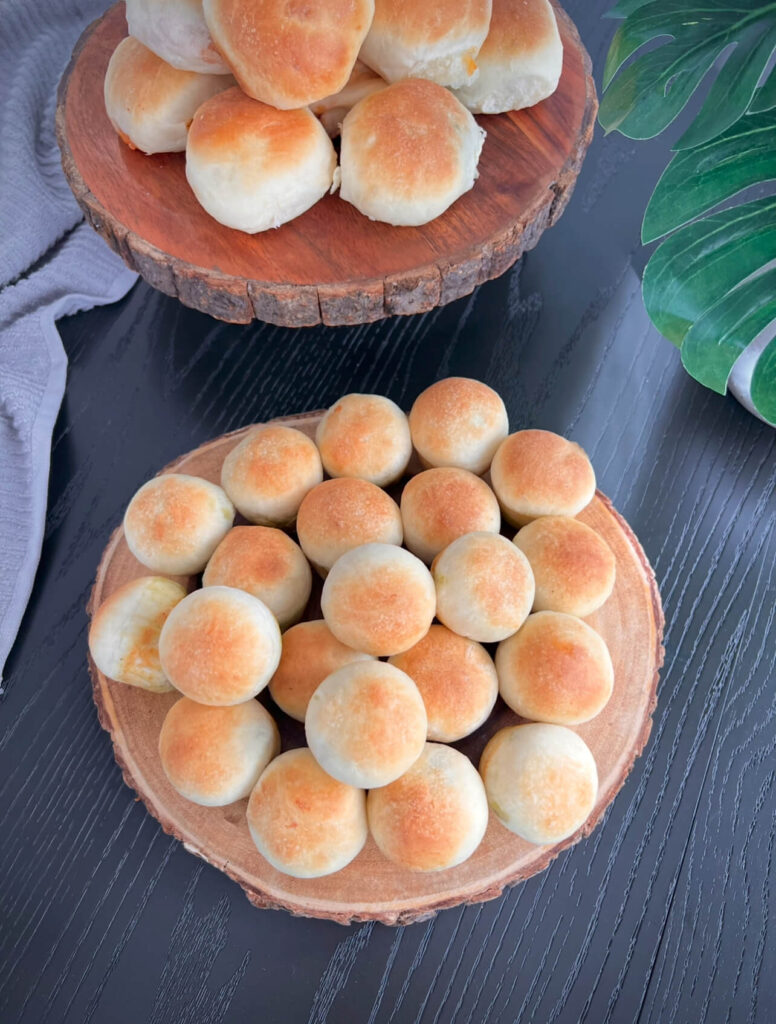
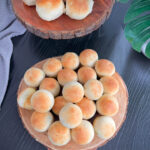
Back-to-school season always has me thinking of fun, filling, and kid-approved lunchbox ideas—and these stuffed buns are one of my absolute favorites. Soft, pillowy dough filled with a variety of delicious options like gooey cheese, zesty zaatar, or even pizza-inspired fillings, makes them the perfect grab-and-go meal. They’re not just great for school lunches—these buns also double as an easy snack, a crowd-pleasing appetizer for gatherings, or even a make-ahead meal for busy weekdays. The best part? You can get creative with the fillings and tailor them to what your family loves most. Whether served warm out of the oven or packed cold for school, these stuffed buns are always a hit!
Stuffed Buns Ingredients
Dough ingredient
Flour
The base of our dough, giving the buns their soft and fluffy texture. All-purpose flour works great, but you can also mix in a little whole wheat flour for added nutrition.
Warm Milk
Adds richness and helps create a tender dough. Using warm (not hot) milk activates the yeast properly and makes the buns extra soft.
Sugar
A small amount of sugar helps feed the yeast, allowing the dough to rise beautifully. It also adds a very light touch of sweetness.
Yeast
The star ingredient that makes the dough rise and become airy. Instant yeast works best for quick results, but active dry yeast can be used as well.
Salt
Balances the flavors and keeps the dough from tasting bland. It also strengthens the gluten in the flour, giving the buns structure.
Oil
Keeps the dough soft and moist while adding a light richness. Any neutral oil works, though olive oil adds a subtle flavor.
Fillings:
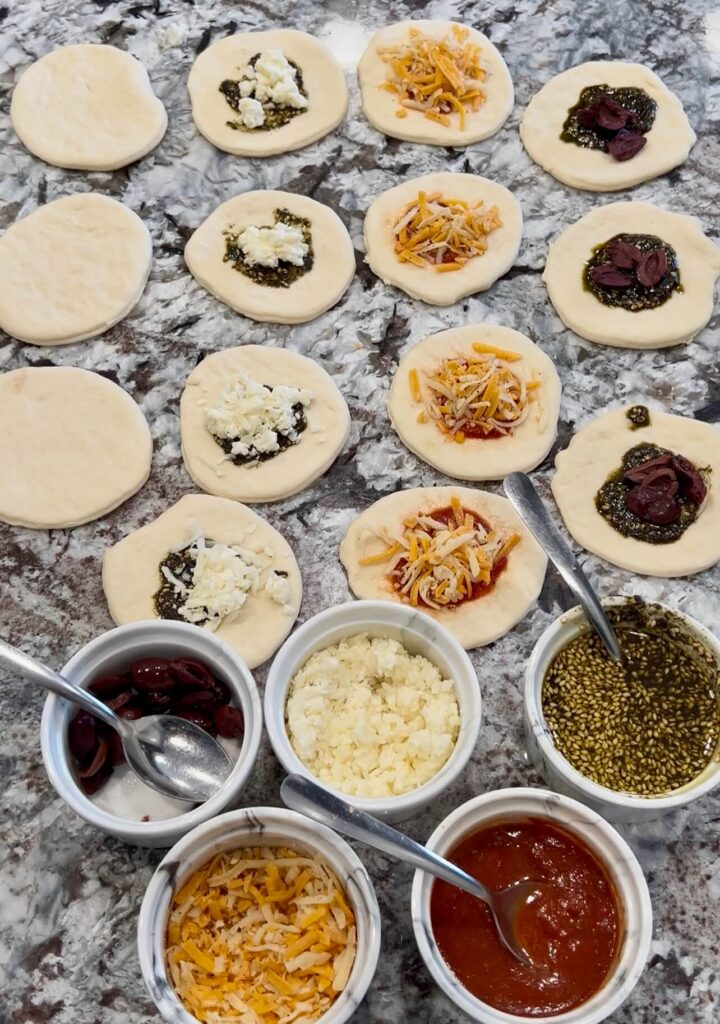
Zaatar Mix
A fragrant Middle Eastern blend of herbs, sesame seeds, and sumac mixed with olive oil. It creates a savory, earthy filling that pairs perfectly with the fluffy dough.
Pizza Sauce
Tomato-based sauce that brings in classic pizza flavors. Great for kids who love pizza, especially when paired with melted cheese inside a bun.
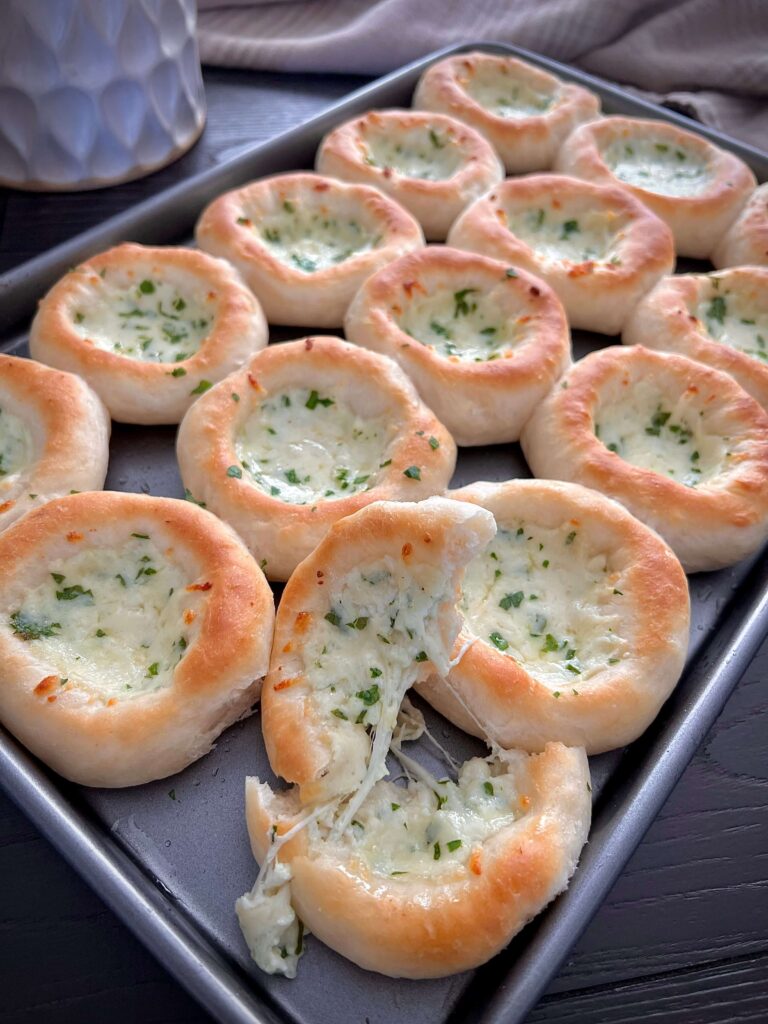
Cheese
You can get creative here—mozzarella for a gooey melt, marble cheese for a sharper taste, akawi cheese for a salty bite, or cream cheese for creaminess. A mix of cheeses gives the best flavor.
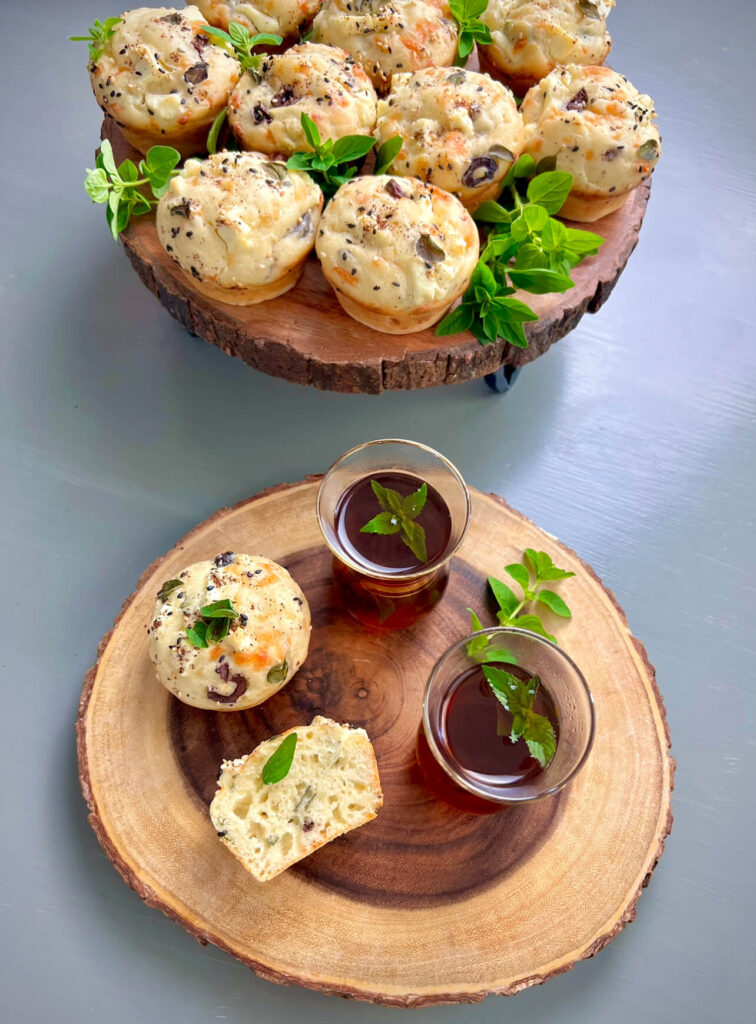
Olives
Chopped olives add a salty, tangy flavor that works well with both zaatar and cheese. They’re optional, but a delicious addition.
How to make stuffed buns — step-by-step
- Activate the yeast: Mix warm milk, yeast, sugar, salt and 2 cups of flour. Let sit for 10 minutes until bubbly.
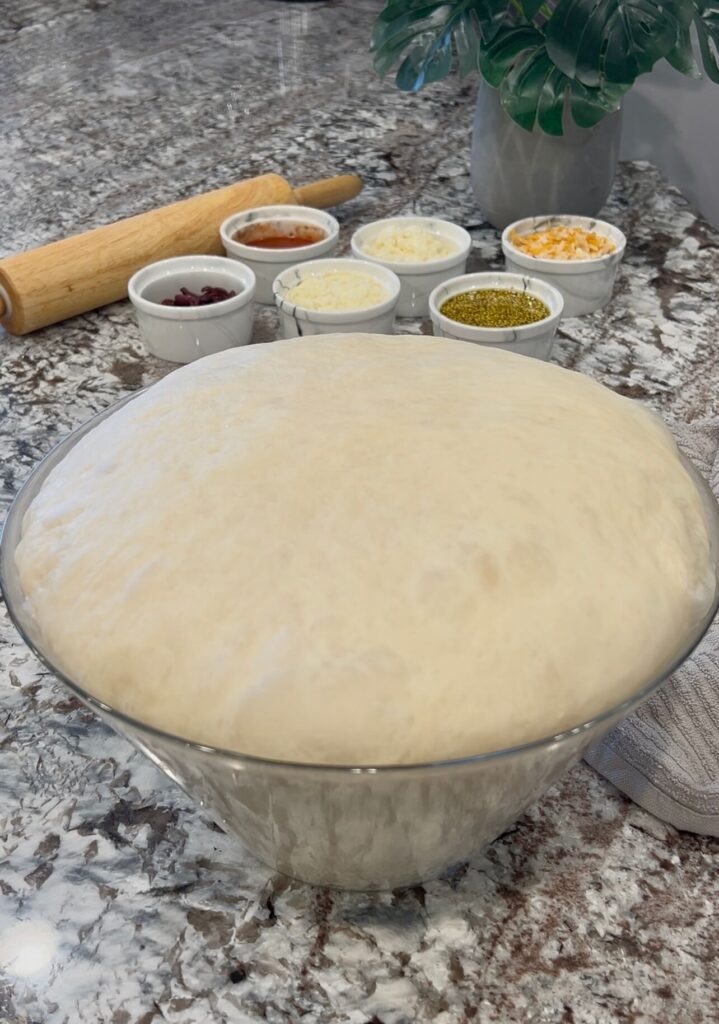
- Make the dough: Add oil, and remaining flour. Knead until soft and smooth.
- Rest: Place in a lightly oiled bowl, cover, and let rise for about 10 minutes or more
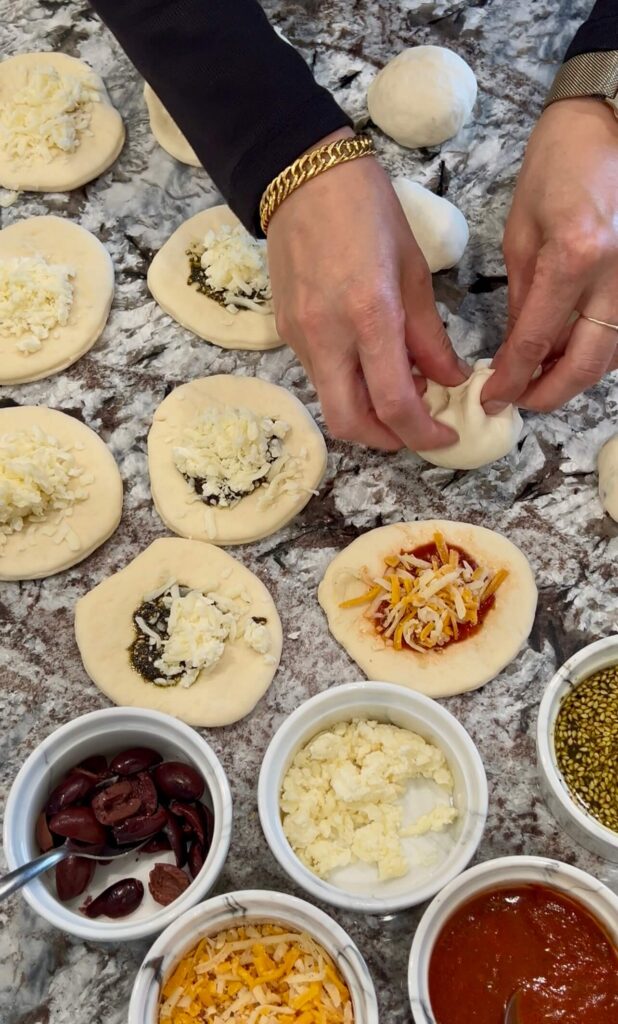
- Prepare fillings: Make zaatar paste, cheese blend, or pizza filling. Keep fillings thick to prevent leaking.
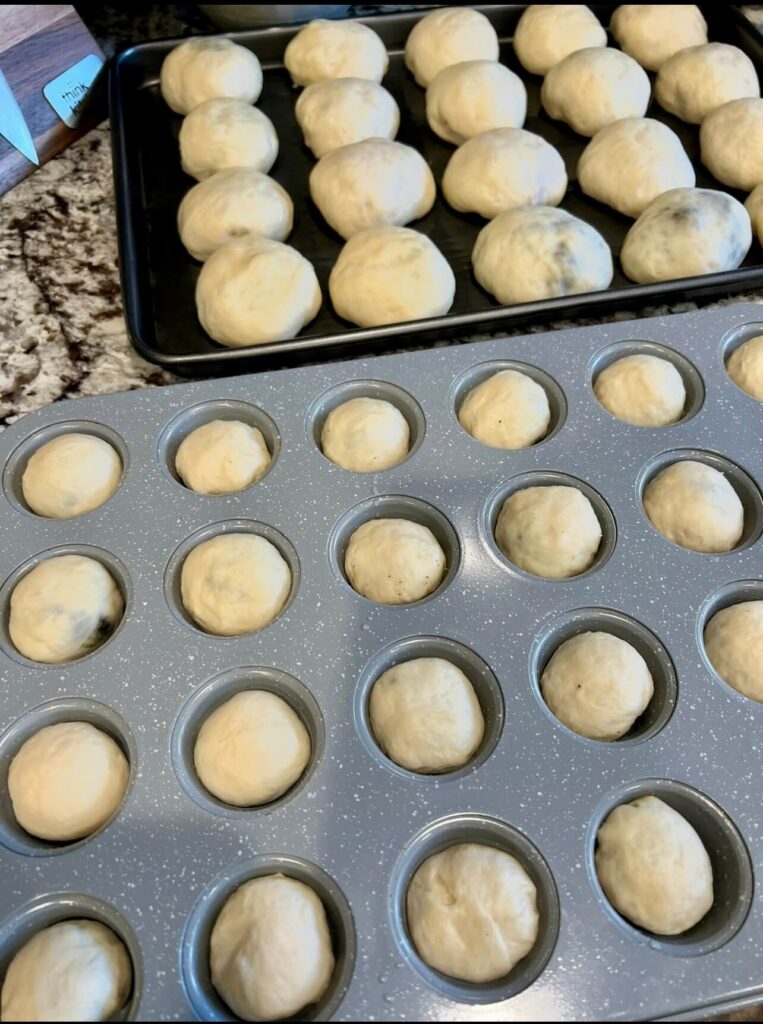
- Divide dough: Punch down, roll into balls (small for snacks, larger for lunch buns).
- Fill & shape: Flatten, add filling, fold and pinch edges tightly.
- Second rise: Place buns on a tray, cover, and let rise 20–30 minutes.
- Finish: Brush with milk or egg wash; sprinkle toppings if desired.
- Bake: Preheat the oven to 480°F (250°C) and bake the buns until golden brown.
- Cool & pack: serve warm or Cool on a wire rack 10–15 minutes before packing for lunch.
Fun Variations: Different Ways to Bake Stuffed Buns
1. Pull-Apart Stuffed Buns (Dinner Roll Style)
Arrange the stuffed dough balls close together in a greased baking dish, just like dinner rolls. Once baked, they rise into each other and become fluffy, golden, and easy to tear apart. This version is perfect for family dinners or as a shareable appetizer.
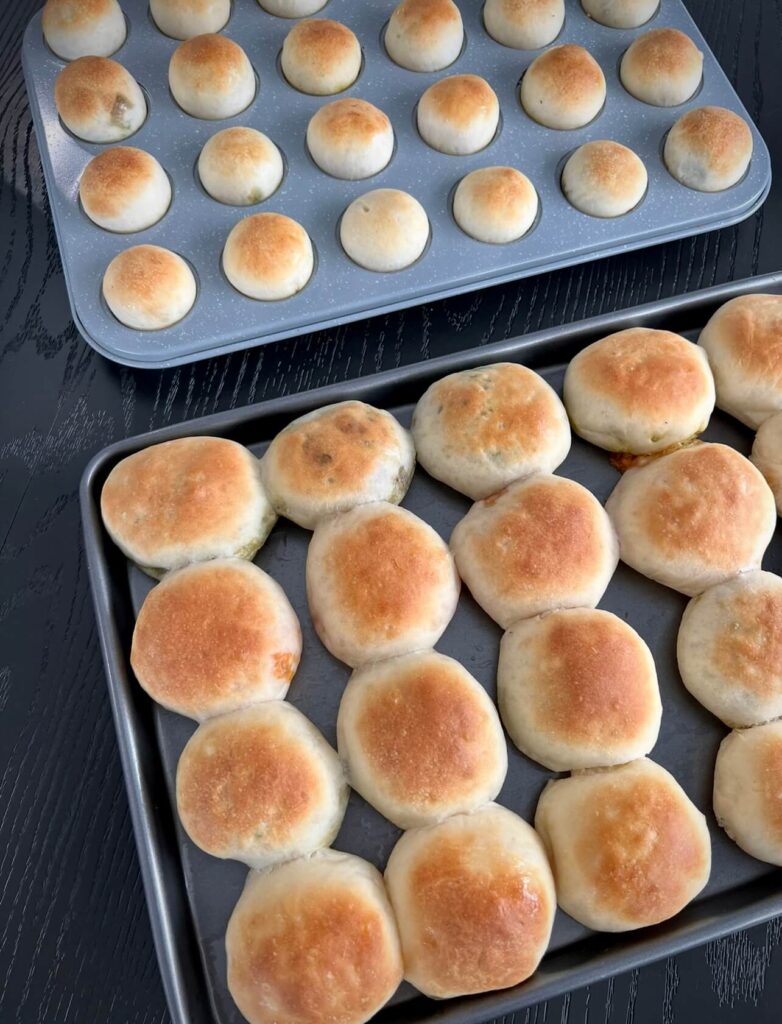
2. Muffin Tray Buns
Shape the dough into smaller stuffed buns and place them in a greased muffin tray. This method ensures uniform size and makes them easy to pack for school lunches. Each bun comes out neat, round, and perfectly portioned.
3. Mini Cupcake Tray Bites
For bite-sized snacks, use a mini cupcake tray. Fill tiny dough balls with cheese, zaatar, or pizza sauce and bake. These mini buns are a hit at parties, potlucks, or as finger food for gatherings.
4. Ring Style (Savory Monkey Bread)
Roll small pieces of stuffed dough and arrange them in a bundt pan or round cake pan. Once baked, you’ll have a beautiful pull-apart bread ring where every bite is filled with deliciousness. It looks impressive on the table and is fun to eat!
5. Sheet Pan Style
Instead of shaping individual buns, roll the dough into a large rectangle, spread your filling, then top with another sheet of dough. Seal the edges, score into squares, and bake. Once golden, cut into pieces for a stuffed “pizza bread” style dish—quick and easy for feeding a crowd.
Filling Ideas for Stuffed Buns
Savory Meat Fillings
- Chicken: Shredded chicken mixed with cream cheese, barbecue sauce, or a touch of garlic mayo for a creamy, flavorful bite.
- Bolognese: Leftover spaghetti sauce with ground beef (drain it well so it’s not too saucy) for a hearty Italian-inspired filling.
- Pepperoni or Salami: Pair with mozzarella and pizza sauce for a “pizza bun” flavor kids love.
- Taco Beef: Seasoned ground beef with a little cheddar or Monterey Jack cheese for a Tex-Mex twist.
Vegetarian Options
- Spinach & Feta: A Mediterranean classic that’s both tangy and savory.
- Mushroom & Onion: Sautéed mushrooms and caramelized onions for a rich, earthy flavor.
- Roasted Vegetables: Bell peppers, zucchini, and eggplant with a sprinkle of mozzarella.
- Classic Cheese: Mix different cheeses—mozzarella, marble, or cheddar—for gooey, melty buns.
Fun Kid-Friendly Combos
- Pizza Style: Pizza sauce, mozzarella, and pepperoni or veggie toppings.
- Mac & Cheese: A spoonful of creamy macaroni and cheese tucked inside a bun.
- Hot Dog Buns: A piece of sausage or hot dog wrapped in dough with a little ketchup or mustard.
Storage & Make-Ahead Tips
Room Temperature
- Once baked, allow the buns to cool completely on a wire rack.
- Store in an airtight container or ziplock bag for up to 2 days at room temperature.
- Warm them up briefly in the oven or microwave before serving, or enjoy them cold in lunchboxes.
Refrigerator
- If you’d like them to last longer, store in an airtight container in the fridge for up to 4–5 days.
- Reheat in the oven for 5–8 minutes at 350°F (175°C) to refresh their texture.
Freezer
- Before baking: Shape and fill the buns, place on a tray, and freeze until solid. Transfer to a freezer bag. When ready to bake, let them thaw and rise at room temperature, then bake as usual.
- After baking: Let baked buns cool completely, wrap individually in plastic wrap or foil, and store in a freezer bag for up to 2 months. Reheat in the oven until warm and fluffy again.
Frequently Asked Questions
Can I make the dough the night before?
Yes! You can prepare the dough, cover it tightly, and refrigerate overnight. The next day, let it sit at room temperature for about 30 minutes before shaping and filling.
Can I freeze stuffed buns?
Absolutely. You can freeze them either before baking (after shaping and filling) or after baking. If freezing unbaked, thaw and let them rise before baking. If freezing baked buns, just reheat in the oven until warm.
Can I use whole wheat flour?
Yes, but the texture will be denser. For the best balance of softness and nutrition, use half whole wheat flour and half all-purpose flour.
How do I stop the filling from leaking out?
Make sure your fillings aren’t too wet and seal the edges of the dough tightly. Pinching the seams well (and even brushing edges with a little water) helps keep everything inside.
Do these taste good cold in lunchboxes?
Yes! They’re soft and flavorful even when eaten cold, which makes them great for school lunches. You can also warm them slightly in the morning, wrap in foil, and pack in a thermos-style lunch container to keep them warm.
Can I add different fillings in one batch?
Of course! You can divide the dough and make a variety of fillings—like cheese, zaatar, chicken, or pepperoni—so everyone in the family has their favorite.
How long do they stay fresh?
At room temperature, they stay soft for 2 days. In the fridge, up to 4–5 days. For longer storage, freeze
Tips & Tricks for Perfect Stuffed Buns
- Don’t rush the dough: Letting the dough rise properly is key to soft and fluffy buns. A warm, draft-free spot helps the yeast do its job.
- Check the yeast: If your starter mixture doesn’t bubble after 10 minutes, the yeast may be old or the milk was too hot. Start again with fresh yeast.
- Keep fillings thick: Avoid watery sauces or vegetables. Drain, cook down, or pat dry fillings so they don’t leak or make the dough soggy.
- Seal tightly: Pinch the edges of the dough well to prevent fillings from escaping while baking. A dab of water on the edges helps them stick.
- Rest before baking: Letting the buns proof a second time (20–30 minutes) gives them a lighter texture and helps them bake evenly.
- Shiny golden tops: Brush buns with egg wash (egg + splash of milk) before baking for a glossy, bakery-style finish. For a softer crust, brush with melted butter right after baking.
- Play with shapes: Try braiding, twisting, or rolling the dough into mini loaves for a fun presentation.
- Mix up the flavors: Don’t be afraid to use leftovers—shredded chicken, taco beef, roasted veggies, or even mac and cheese all make great fillings.
- Bake and freeze: Make a double batch and freeze half for quick snacks and lunchbox add-ins.
More recipes to try
Stuffed Buns
Ingredients
For the Dough:
- 5 cups all-purpose flour
- 2 cups warm milk
- 2 tbsp sugar
- 2 tbsp instant yeast
- 2 tsp salt
- 1/2 cup oil + 1 tbsp
For the Fillings
- Zaatar Mix: 1/4 cup olive oil + 1/3 cup zaatar herb
- Pizza Filling: pizza sauce + mozzarella or marble cheese
- Cheese Blend: 1/4 cup cream cheese + 1/2 cup akawi cheese shredded + 1/2 cup mozzarella cheese
- Olives optional, chopped
Instructions
- Activate the yeast: Mix warm milk, yeast, sugar, salt and 2 cups of flour. Let sit 10 minutes until bubbly.
- Make the dough: Add oil, and remaining flour. Knead until soft and smooth.
- Rise: Place in a lightly oiled bowl, cover, and let double in size 10 minutes or more
- Prepare fillings: Make zaatar paste, cheese blend, or pizza filling. Keep fillings thick to prevent leaking.
- Divide dough: Punch down, roll into balls (small for snacks, larger for lunch buns).
- Fill & shape: Flatten, add filling, fold and pinch edges tightly.
- Second rise: Place buns on a tray, cover, and let rise 20–30 minutes.
- Finish: Brush with milk or egg wash; sprinkle toppings if desired.
- Bake: Preheat the oven to 480°F (250°C) and bake the buns until golden brown.
- Cool & pack: serve warm or cool on a wire rack 10–15 minutes before packing for lunch.
Notes
- Oven temperatures may vary: Keep an eye on the buns while baking; they should be golden brown on top. Adjust baking time slightly if needed.
- Dough consistency: The dough should be soft and slightly sticky but manageable. Add a little flour or milk if needed while kneading.
- Portion sizes: Adjust the size of buns based on your needs—smaller for snacks or lunchboxes, larger for meals or gatherings.
- Filling flexibility: Almost any filling works—cheese, meats, vegetables, or even sweet fillings like Nutella or jam.
- Make-ahead tips: Shape and freeze buns before baking, or bake and freeze for later. Reheat in the oven for best results.
- Serving: Serve warm for melty cheese or cool for convenient lunchboxes. They’re delicious either way!